
티스토리 뷰
설치
1. 아나콘다 설치
2.가상황경 생성
conda create --name 가상환경이름 python=3.7
(텐서플로우 가능한 파이선 버전)
conda activate 가상환경이름
2. 텐서플로설치
conda install tensorflow
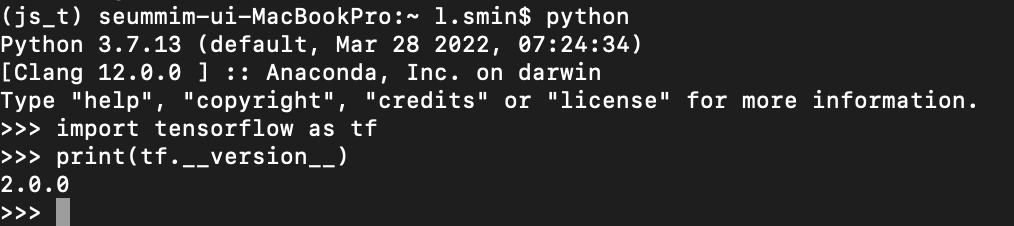
3.버전확인
4. COCO로 사전훈련된 모델을 활용하여 객체 검출을 위한 준비물
https://drive.google.com/file/d/14pinp4GD-5JQBpSnvpgg-txwLgl1YkEW/view?usp=sharing
COCO사이트에서 학습모델 다운받는데 ... 텐서플로 깃에서 받을수 있다고한다......-> 확인 안 됨 : 일단 있는거 사용
***(SSD MobileNet v2 320x320)
체크포인트파일 (checkpoint,ckpt),모델 저장파일(.pb) 설정파일 (.config)
***라벨맵은 따로 다운로드 (mscoco_label_map.pbtxt)
https://cocodataset.org/#download
5.객체 검출
훈련된 추론 모델을 파이썬에 적용하려면 SavedModle (패키지)포맷 (-> 함수코드?)을 활용한다. : tf.saved_model.load(경로)
saved_model 모듈로 모델 파일을 불러온다.(saved_model)
위에서 준비한 파일들은 같은 경로에 넣어준다.

import numpy as np
import tensorflow as tf
import cv2 as cv
import os

#추론 모델 불러오기. 추론을 진행할 수 있게한다.
model = tf.saved_model.load("./ssd_mobilenet_v2_320x320_coco17_tpu-8/saved_model")
6.아나콘다에서 open CV 설치
import cv2 안 되면 오픈씨비 안 깔려있는 거
Python에서 Conda를 사용하여 OpenCV 설치
이 자습서에서는 Python에서 Conda를 사용하여 OpenCV를 설치하는 방법에 대해 설명합니다.
www.delftstack.com
conda install -c conda-forge opencv
conda install -c conda-forge/label/gcc7 opencv
conda install -c conda-forge/label/broken opencv
conda install -c conda-forge/label/cf201901 opencv
conda install -c conda-forge/label/cf202003 opencv
7. 코드 작성
파일 내 모든 jpg 파일 불러와서 이미지 객체 검출 진행하고,
검출된 단어들을 txt 파일에 저장..
import cv2
import numpy as np
import tensorflow as tf
# 정규 표현식 적용
import re
import sys
#파일생성저장
import shutil
import os
os.environ['TF_CPP_MIN_LOG_LEVEL']='2'
#폴더에 접근하기(절대경로 입력)
import glob
img_files = glob.glob('/Users/l.smin/PycharmProjects/pythonProject/img_object/ImagesForTest/100/*.JPG')
# img_files = glob.glob('/Users/l.smin/PycharmProjects/pythonProject/img_object/ImagesForTest/100/AUNJ9016.JPG')
# 이미지 없을때 예외처리
if not img_files:
    print("jpg 없음..")
    sys.exit()

#사진 담을 폴더 만든다
save_folder = '/Users/l.smin/PycharmProjects/pythonProject/img_object/ImagesForTest'
if not os.path.exists(save_folder):
    os.makedirs(save_folder)


# #라벨 불러오기
# for f in img_files :
#     #img file name print
#     # print(f)

with open("mscoco_complete_label_map.pbtxt","rt") as f:
    pb_classes = f.read().rstrip("\n").split("\n")
    class_label = dict()

    for i in range(0,len(pb_classes),5):
        pb_classId = int(re.findall("\d+",pb_classes[i+2])[0])
        pattern = 'display_name: "(.*?)"'
        pb_text = re.search(pattern, pb_classes[i+3])
        class_label[pb_classId] = pb_text.group(1)


#모델 불러오기
model = tf.saved_model.load("./ssd_mobilenet_v2_320x320_coco17_tpu-8/saved_model")

#이름 출력
class MyImage:
    def __init__(self, img_name):
        self.img = cv2.imread(img_name)
        self.__name = img_name

    def __str__(self):
        return self.__name
#불러온 모든 이미지 읽기

#이미지 인덱스
count = len(img_files)
index = 0

while True :
    img = cv2.imread(img_files[index])
    # img_name = MyImage(img_files[index])
    # img= img_name.img
    # print(str(img_name))
    #예외처리
    if img is None :
        print("이미지를 불러오는데 실패했습니다.")
        break

    #이미지 검출
    input_img = cv2.cvtColor(img, cv2.COLOR_BGR2RGB)
    input_tensor = tf.convert_to_tensor(input_img)
    input_tensor = input_tensor[tf.newaxis, ...]

    output_dict = model.signatures["serving_default"](input_tensor)

    classes = output_dict["detection_classes"][0]
    scores = output_dict["detection_scores"][0]
    boxes = output_dict["detection_boxes"][0]

    #text 파일 만들어서 단어저장하기
    txt_path = '/Users/l.smin/PycharmProjects/pythonProject/img_object/detected_words.txt'
    text_file=open(txt_path,'w+')
    #'r': 읽기
    #'w': 덮어쓰기 (+ : 파일 없으면 만들어서 작성한다.)
    #'a': 이어쓰기
    #이미지 검출 박스 텍스트 그리기
    height, width, _ = img.shape
    count = 0
    value = []
    for idx, score in enumerate(scores):
        if score > 0.54:
            class_id = int(classes[idx])
            box = boxes[idx]

            x1 = int(box[1] * width)
            y1 = int(box[0] * height)
            x2 = int(box[3] * width)
            y2 = int(box[2] * height)

            cv2.rectangle(img, (x1, y1), (x2, y2), 255, 1)
            cv2.putText(img, class_label[class_id] + ":" + str(float(score)), (x1, y1 - 5), cv2.FONT_HERSHEY_COMPLEX,
                        1.5, (0, 255, 255), 1)
            #검출된 단어 텍스트파일에 저장 #####################
            text_file.write(class_label[class_id] + '\n')

            if idx == 0 :
                # 사진을 저장할 경로와 폴더를 만든다.
                # text = str(img_name)
                fname = os.path.split(img_files[index])[1]
                folder2save = os.path.join(save_folder,'O' )
                fpath2save = os.path.join(folder2save, fname)
                if not os.path.exists(folder2save):
                    os.makedirs(folder2save)

                # 사진을 복사한다. src,dst
                shutil.copyfile(img_files[index], fpath2save)
        else :
            value.append(count)
            if len(value) > 99 :
                print('nothing detected')
                # 사진을 저장할 경로와 폴더를 만든다.
                fname = os.path.split(img_files[index])[1]
                folder2save = os.path.join(save_folder,' X' )
                fpath2save = os.path.join(folder2save, fname)
                if not os.path.exists(folder2save):
                    os.makedirs(folder2save)

                # 사진을 복사한다. src,dst
                shutil.copyfile(img_files[index], fpath2save)
            count = count +1

    # cv2.imshow("Object Dectection", img)
    # cv2.waitKey(0)

    #다음 이미지로 +1
    index += 1
    if index >= count :
        index = 0


cv2.destroyAllWindows()
text.close()
txt 파일에 단어들이 저장된다.
이거를 분류 카운팅해보자
파이썬[Python] 단어들의 사용빈도 확인하기
우리는 글을 쓰면서, 특정 단어들을 격하게 많이 사용하는 경우가 있습니다. 그리고 때론, 특정 단어들의 사용 빈도와 상관없이 이미 그 단어들을 사용하고 있을 수 있습니다. 그래서 이번 포스
appia.tistory.com
txt 파일을 읽어와서 줄별로 단어를 split 해주고
get으로 카운딩하는것 같음
txt_path = 'detected_words.txt'
file = open(txt_path, 'r')
text = file.read()
words = text.split('\n')
word_counts = dict()

for word in words :
    # Get 명령어를 통해, Dictionary에 Key가 없으면 0리턴
    word_counts[word] = word_counts.get(word,0) +1 #단어의 카운트증가

for word, count in word_counts.items():
print(word,count)'Coding > BigData_Python' 카테고리의 다른 글
| 태양시 계산.py(SolarTime) (0) | 2024.03.03 |
|---|---|
| python_ text를 모스부호로 바꾸기.txt -> csv (1) | 2022.09.25 |
| yolo 이미지 분석 스터디 (0) | 2022.08.03 |
| Python_ .py 호출하기 (0) | 2022.04.25 |
| Naver 크롤링 : 파파고 python + 도서 API (0) | 2022.03.14 |
- Total
- Today
- Yesterday
- VFXgraph
- colab
- Python
- Arduino
- MQTT
- krea
- Express
- DeepLeaning
- 라즈베리파이
- MCP
- opticalflow
- ai film
- 후디니
- sequelize
- RNN
- Midjourney
- Java
- three.js
- TouchDesigner
- 4d guassian splatting
- CNC
- houdini
- VR
- opencv
- Unity
- node.js
- 유니티
- docker
- 4dgs
- AI
| 일 | 월 | 화 | 수 | 목 | 금 | 토 |
|---|---|---|---|---|---|---|
| 1 | 2 | 3 | ||||
| 4 | 5 | 6 | 7 | 8 | 9 | 10 |
| 11 | 12 | 13 | 14 | 15 | 16 | 17 |
| 18 | 19 | 20 | 21 | 22 | 23 | 24 |
| 25 | 26 | 27 | 28 | 29 | 30 | 31 |