
티스토리 뷰
https://ing-min.tistory.com/239
아두이노_ Micro SD Card_ 비접촉 온도센서(MLX90614) .csv 기록 + OLED 스크린
CS-??제어핀 (내가원하는데로 지정해줘도 됨 기본 4) 나는 1로 바꿈 SCK MOSI MISO VCC GND https://blog.naver.com/PostView.naver?blogId=walk_along&logNo=222153986622&categoryNo=30&parentCategoryNo=15 [아두이노 7강-2] 시간에 맞춰
ing-min.tistory.com

mqtt test
win
1. mosquitto 설치 (브로커 중개)
https://mosquitto.org/download/
Download
Source mosquitto-2.0.18.tar.gz (GPG signature) Git source code repository (github.com) Older downloads are available at https://mosquitto.org/files/ Binary Installation The binary packages listed be
mosquitto.org
(중개 설명 글)
https://ing-min.tistory.com/30
***config 수정
https://blog.naver.com/loyz/222654739136
Mosquitto 설치 및 설정
mosquitto는 open source mqtt broker이다. 설치 환경 : Windows 10, 64bit https://mosquitto.org/downlo...
blog.naver.com
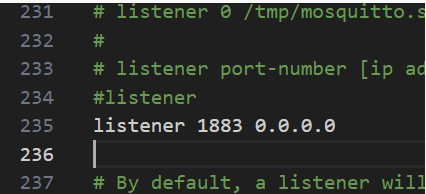
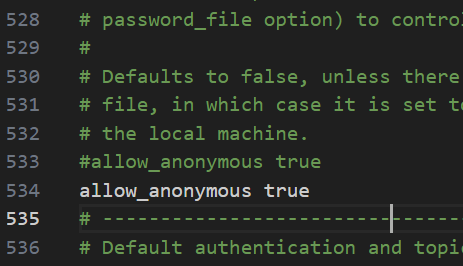
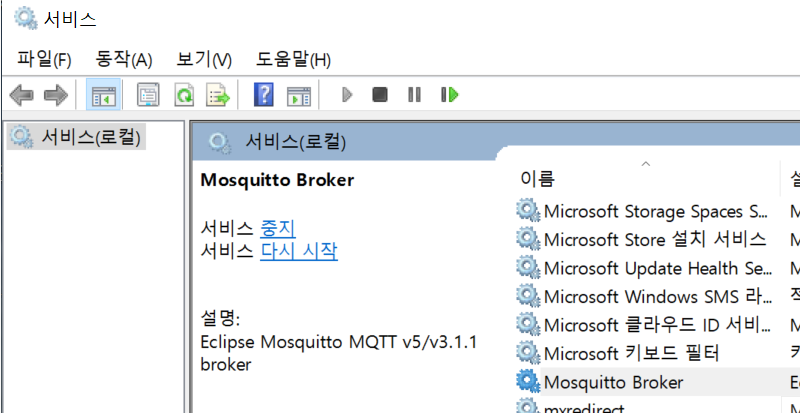
**mosquitto 시작
시작 - 서비스 -mosquitto
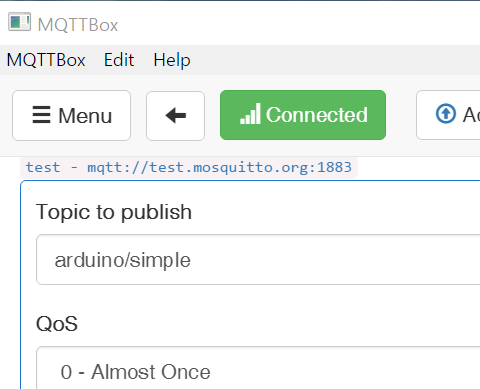
2. mqttbox 다운로드
MQTTBOX
create MQTT Client(서버 설정)


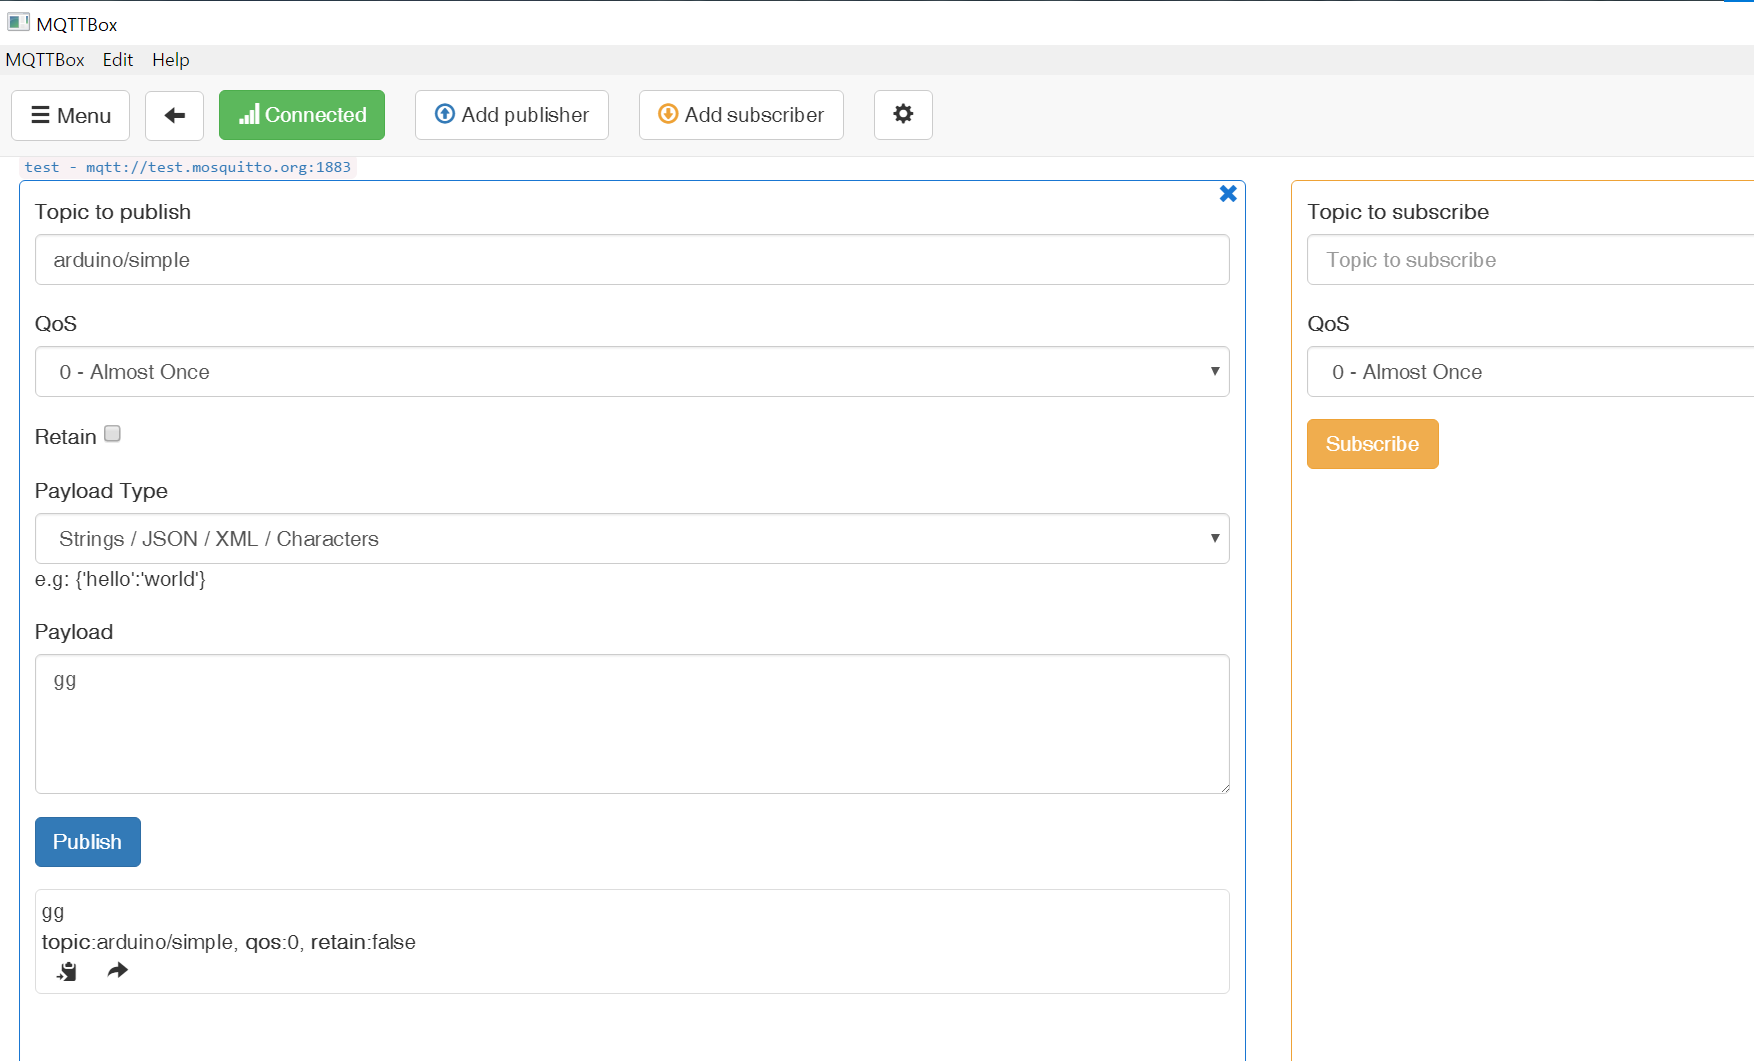
초록불떠야함. connected
아두이노
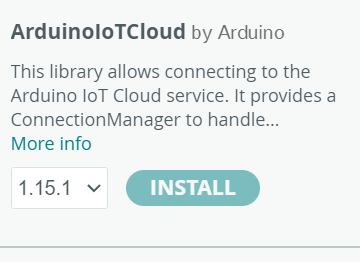
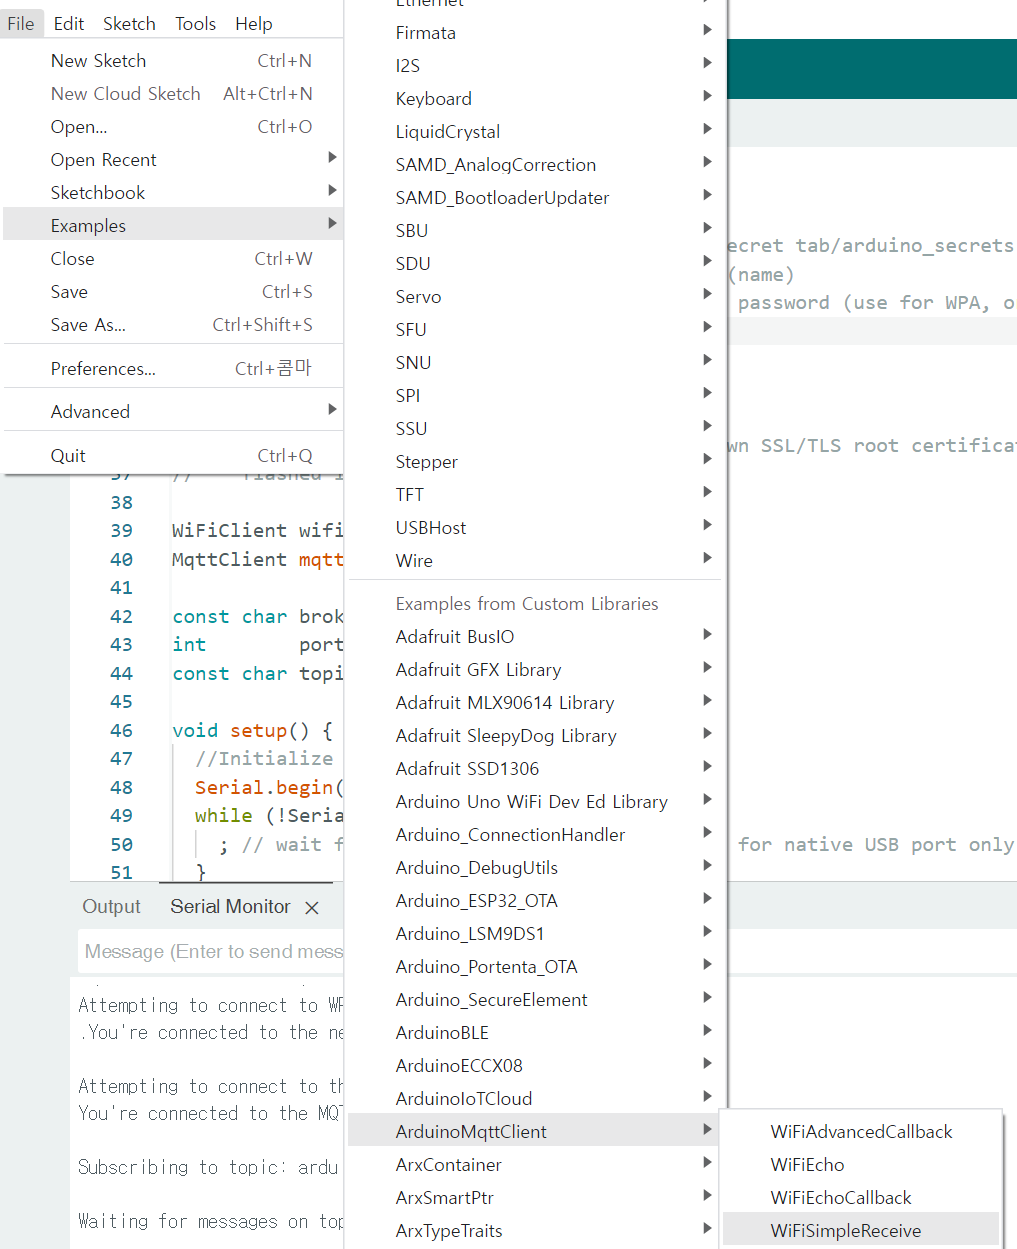
1. 라이브러리 설치 / 예제 실행
wifisimplereceive
/*
  ArduinoMqttClient - WiFi Simple Receive

  This example connects to a MQTT broker and subscribes to a single topic.
  When a message is received it prints the message to the Serial Monitor.

  The circuit:
  - Arduino MKR 1000, MKR 1010 or Uno WiFi Rev2 board

  This example code is in the public domain.
*/

#include <ArduinoMqttClient.h>
#if defined(ARDUINO_SAMD_MKRWIFI1010) || defined(ARDUINO_SAMD_NANO_33_IOT) || defined(ARDUINO_AVR_UNO_WIFI_REV2)
  #include <WiFiNINA.h>
#elif defined(ARDUINO_SAMD_MKR1000)
  #include <WiFi101.h>
#elif defined(ARDUINO_ARCH_ESP8266)
  #include <ESP8266WiFi.h>
#elif defined(ARDUINO_PORTENTA_H7_M7) || defined(ARDUINO_NICLA_VISION) || defined(ARDUINO_ARCH_ESP32) || defined(ARDUINO_GIGA) || defined(ARDUINO_OPTA)
  #include <WiFi.h>
#elif defined(ARDUINO_PORTENTA_C33)
  #include <WiFiC3.h>
#elif defined(ARDUINO_UNOR4_WIFI)
  #include <WiFiS3.h>
#endif

#include "arduino_secrets.h"
///////please enter your sensitive data in the Secret tab/arduino_secrets.h
char ssid[] = "****여기 와이파이 이름";    // your network SSID (name)
char pass[] = "*****여기와이파이비번" ;    // your network password (use for WPA, or use as key for WEP)

// To connect with SSL/TLS:
// 1) Change WiFiClient to WiFiSSLClient.
// 2) Change port value from 1883 to 8883.
// 3) Change broker value to a server with a known SSL/TLS root certificate
//    flashed in the WiFi module.

WiFiClient wifiClient;
MqttClient mqttClient(wifiClient);

const char broker[] = "test.mosquitto.org"; //기본값
int        port     = 1883;//기본값
const char topic[]  = "arduino/simple";//기본값 ****여기 구독 Topic 설정

void setup() {
  //Initialize serial and wait for port to open:
  Serial.begin(9600);
  while (!Serial) {
    ; // wait for serial port to connect. Needed for native USB port only
  }

  // attempt to connect to WiFi network:
  Serial.print("Attempting to connect to WPA SSID: ");
  Serial.println(ssid);
  while (WiFi.begin(ssid, pass) != WL_CONNECTED) {
    // failed, retry
    Serial.print(".");
    delay(5000);
  }

  Serial.println("You're connected to the network");
  Serial.println();

  // You can provide a unique client ID, if not set the library uses Arduino-millis()
  // Each client must have a unique client ID
  // mqttClient.setId("clientId");

  // You can provide a username and password for authentication
  // mqttClient.setUsernamePassword("username", "password");

  Serial.print("Attempting to connect to the MQTT broker: ");
  Serial.println(broker);

  if (!mqttClient.connect(broker, port)) {
    Serial.print("MQTT connection failed! Error code = ");
    Serial.println(mqttClient.connectError());

    while (1);
  }

  Serial.println("You're connected to the MQTT broker!");
  Serial.println();

  Serial.print("Subscribing to topic: ");
  Serial.println(topic);
  Serial.println();

  // subscribe to a topic
  mqttClient.subscribe(topic);

  // topics can be unsubscribed using:
  // mqttClient.unsubscribe(topic);

  Serial.print("Waiting for messages on topic: ");
  Serial.println(topic);
  Serial.println();
}

void loop() {
  int messageSize = mqttClient.parseMessage();
  if (messageSize) {
    // we received a message, print out the topic and contents
    Serial.print("Received a message with topic '");
    Serial.print(mqttClient.messageTopic());
    Serial.print("', length ");
    Serial.print(messageSize);
    Serial.println(" bytes:");

    // use the Stream interface to print the contents
    while (mqttClient.available()) {
      Serial.print((char)mqttClient.read());
    }
    Serial.println();

    Serial.println();
  }
}
arduino/simple :이거를
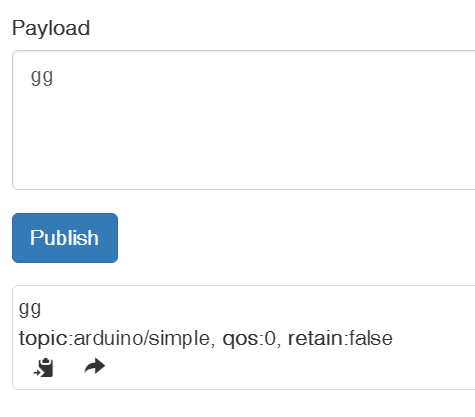
아무 값이나 써서 퍼블리쉬
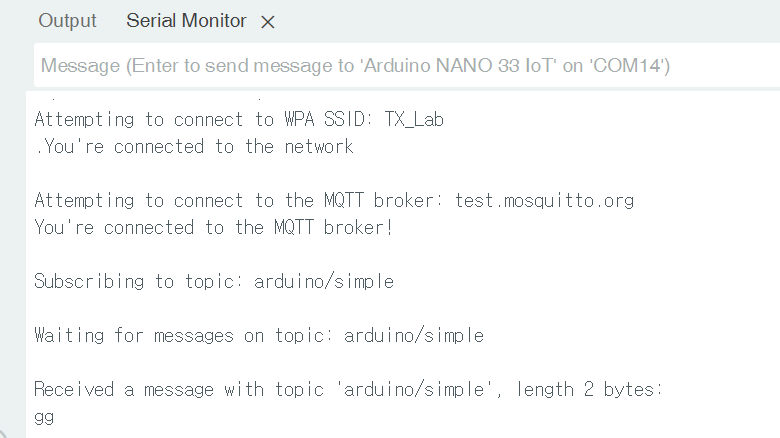
잘됨 !
이제 mqtt로 아두이노 보드에서 값을 보내고 TouchDesigner에서 받아보자.
TouchDesigner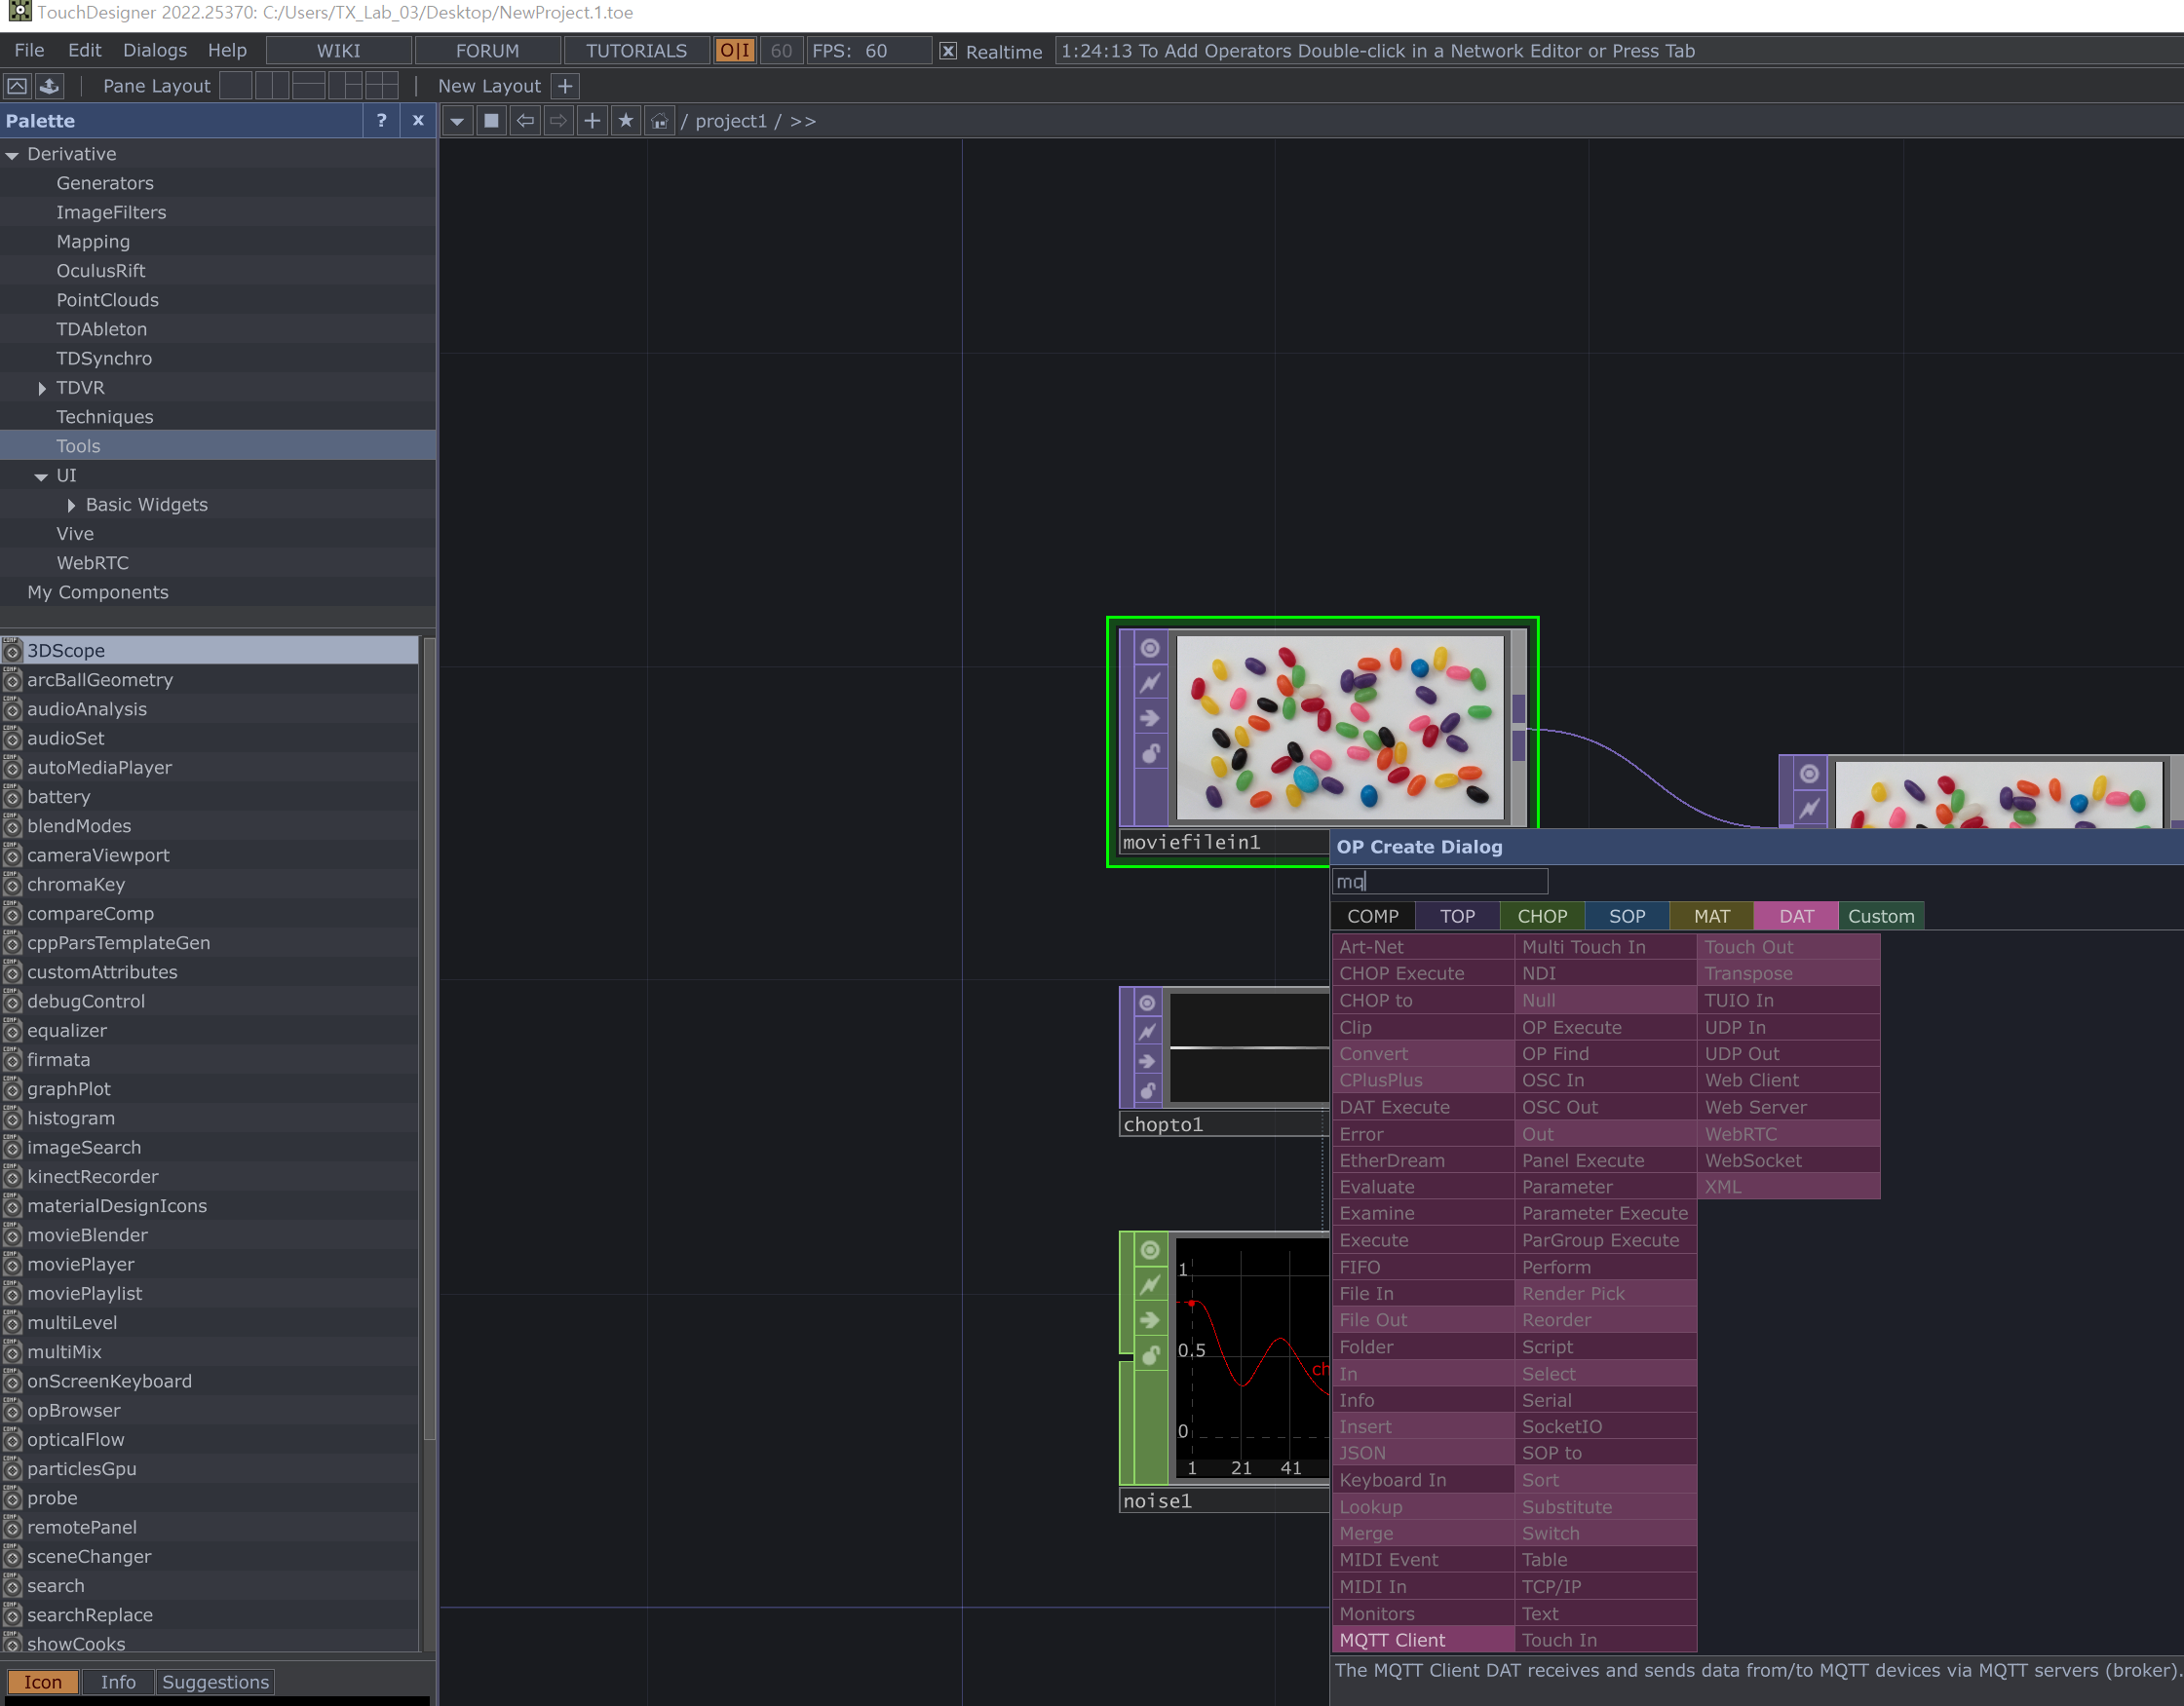
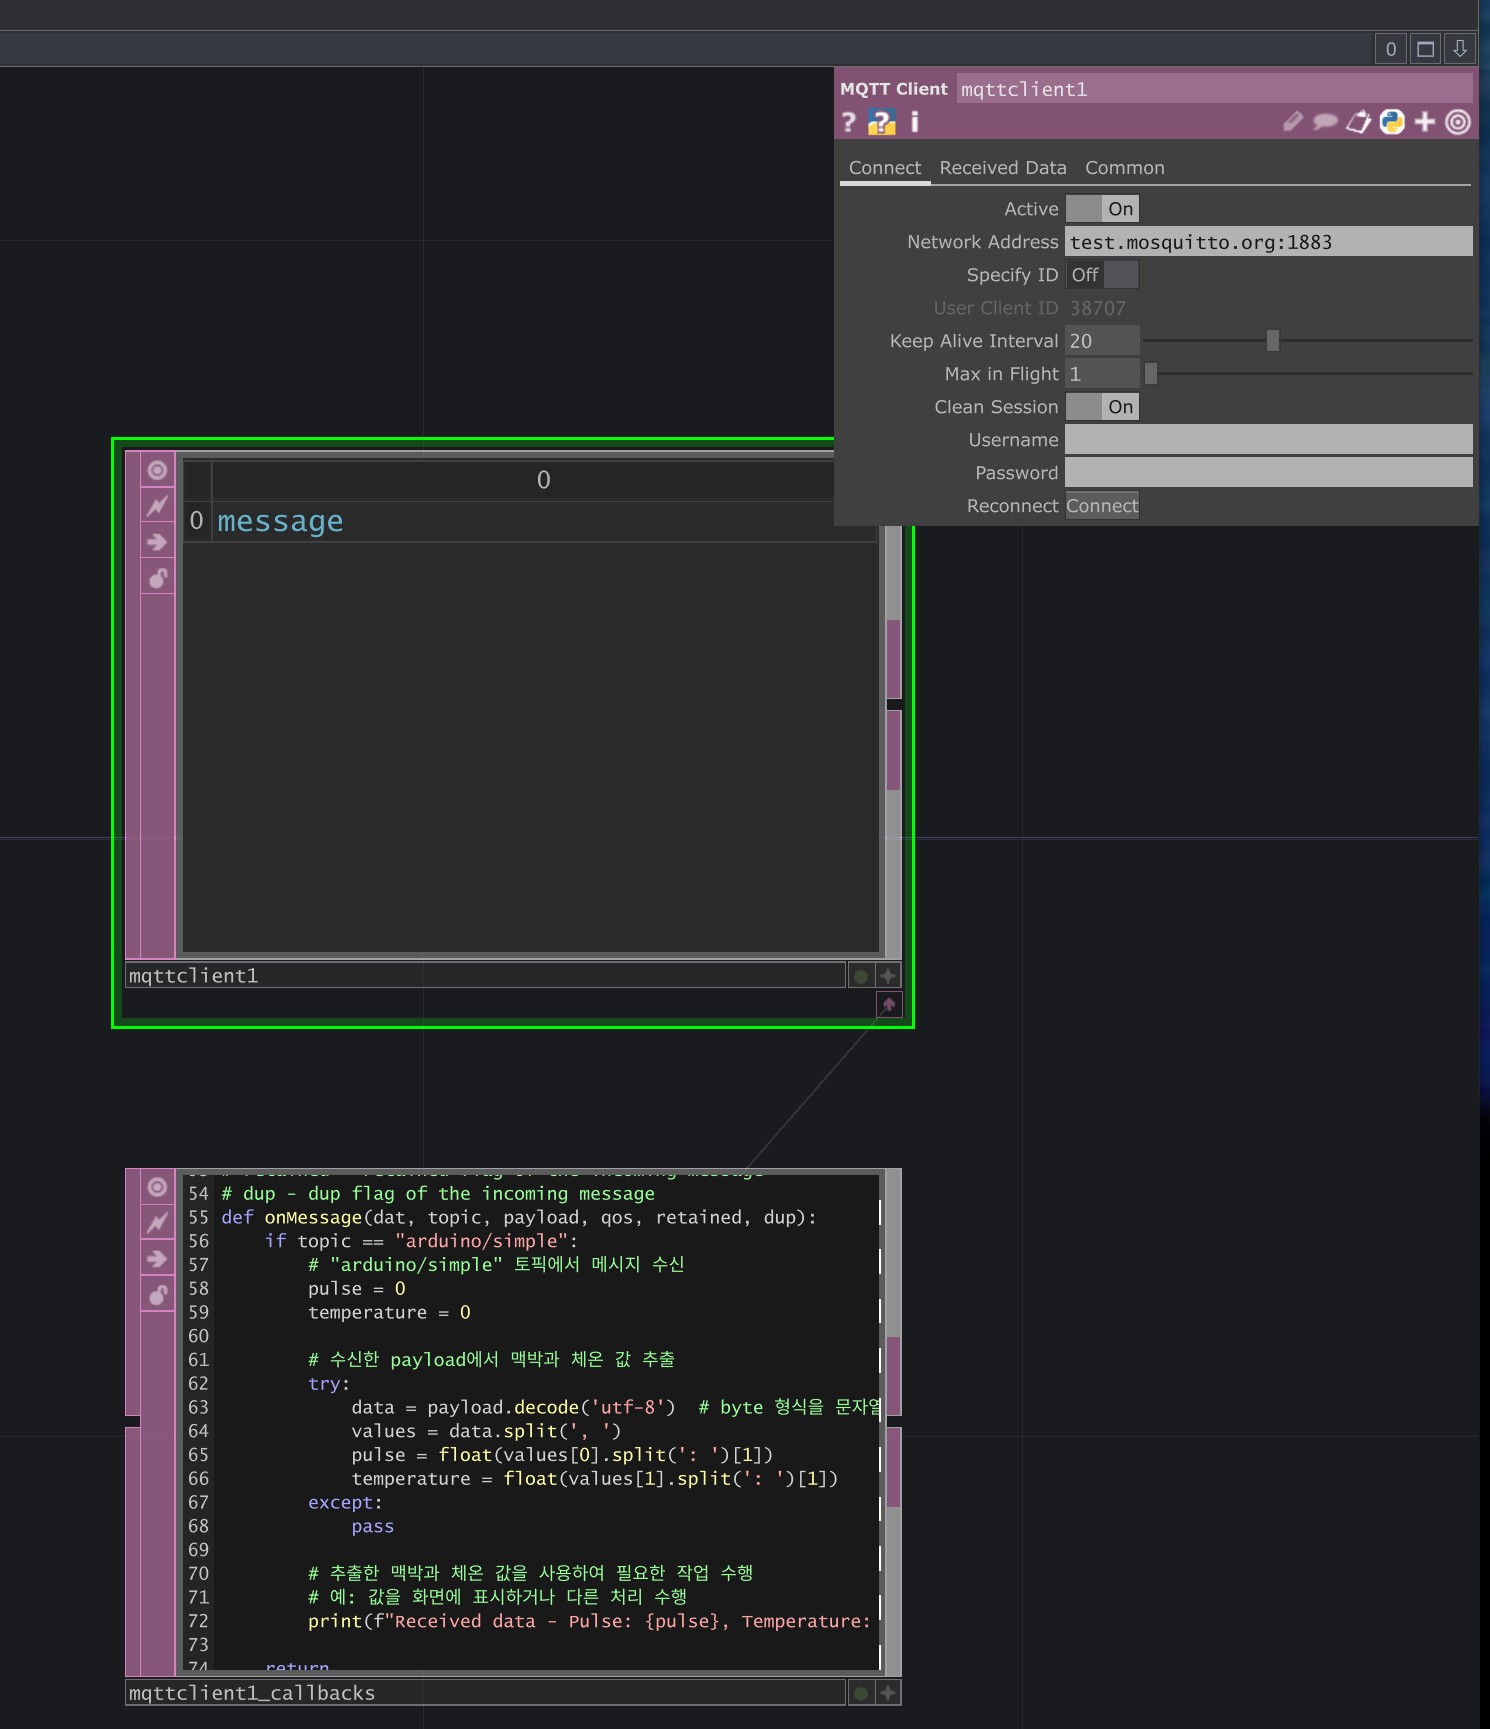
# me - this DAT

# MQTT 브로커 정보

subscribed_topic = "arduino/simple"

# Called when connection established
# dat - the OP which is cooking
##connect에서 subscribe 적어줘야한다 ********
def onConnect(dat):
	op("mqttclient1").subscribe(subscribed_topic)
	return

# Called when connection failed
# dat - the OP which is cooking
# msg - reason for failure
def onConnectFailure(dat, msg):
    print(f"Connection failed: {msg}")
    return

# Called when current connection lost
# dat - the OP which is cooking
# msg - reason for failure
def onConnectionLost(dat, msg):
    print(f"Connection lost: {msg}")
    return

# Called when server receives subscription request
# dat - the OP which is cooking
def onSubscribe(dat):
    print(f"Subscribed to topic: {subscribed_topic}")
    return

# Called when subscription request fails.
# dat - the OP which is cooking
# msg - reason for failure
def onSubscribeFailure(dat, msg):
    print(f"Subscription failed: {msg}")
    return

# Called when server receives unsubscription request
# dat - the OP which is cooking
def onUnsubscribe(dat):
    print(f"Unsubscribed from topic: {subscribed_topic}")
    return

# Called when unsubscription request fails.
# dat - the OP which is cooking
# msg - reason for failure
def onUnsubscribeFailure(dat, msg):
    print(f"Unsubscription failed: {msg}")
    return

# Called when server receives publish request
# dat - the OP which is cooking
def onPublish(dat):
    print("Publish request received")
    return

# Called when new content received from server
# dat - the OP which is cooking
# topic - topic name of the incoming message
# payload - payload of the incoming message
# qos - qos flag for of the incoming message
# retained - retained flag of the incoming message
# dup - dup flag of the incoming message
def onMessage(dat, topic, payload, qos, retained, dup):
    print(f"Received message - Topic: {topic}, Payload: {payload}, QoS: {qos}, Retained: {retained}, Dup: {dup}")

    if topic == subscribed_topic:
        # 메시지 처리 로직
        pulse = 0
        temperature = 0

        try:
            data = payload.decode('utf-8')
            print(f"Decoded payload: {data}")
            values = data.split(', ')
            print(f"Split values: {values}")
            pulse = float(values[0].split(': ')[1])
            temperature = float(values[1].split(': ')[1])
        except Exception as e:
            print(f"Error parsing payload: {e}")
            pass

        print(f"Received data - Pulse: {pulse}, Temperature: {temperature}")

    return
프롬프트를 켜서 값이 잘 받아와지는지 확인
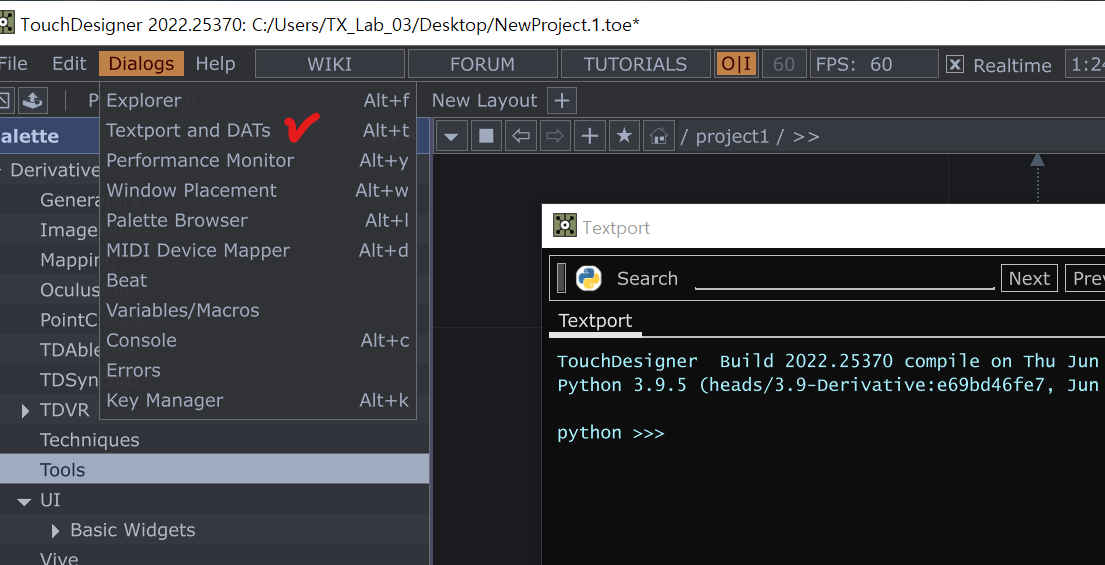
실행.
터디 실패: mqttbox에는 값 잘 들어오는데, 터디에는 안 찍힘.

성공

아두이노 오류
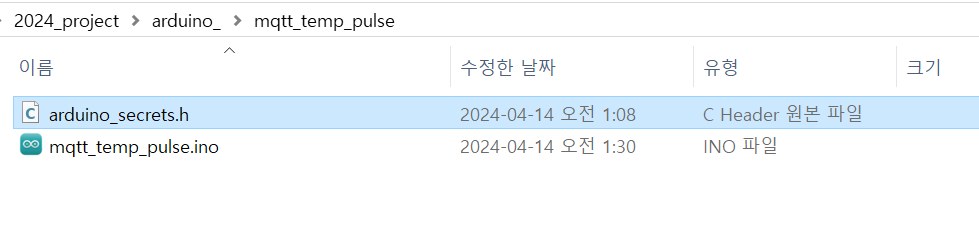
0: fatal error: arduino_secrets.h: No such file or directory #include "arduino_secrets.h"
해결
이 문제를 해결하려면 "arduino_secrets.h" 파일을 프로젝트 폴더에 직접 생성해야 합니다. 아두이노 IDE에서 다음 단계를 수행하세요:
스케치 폴더에서 "arduino_secrets.h"라는 이름의 새 파일을 생성합니다.
#define SECRET_SSID ""
#define SECRET_PASS ""
***마지막으로 아두이노를 컴퓨터에서 해제하고
배터리로 mqtt 값만 보내지면 됨.
- Total
- Today
- Yesterday
- opticalflow
- three.js
- 후디니
- sequelize
- 4d guassian splatting
- Python
- DeepLeaning
- 4dgs
- Java
- colab
- AI
- ai film
- VFXgraph
- Midjourney
- 라즈베리파이
- Unity
- CNC
- opencv
- Arduino
- houdini
- TouchDesigner
- MQTT
- Express
- VR
- 유니티
- node.js
- docker
- krea
- MCP
- RNN
| 일 | 월 | 화 | 수 | 목 | 금 | 토 |
|---|---|---|---|---|---|---|
| 1 | ||||||
| 2 | 3 | 4 | 5 | 6 | 7 | 8 |
| 9 | 10 | 11 | 12 | 13 | 14 | 15 |
| 16 | 17 | 18 | 19 | 20 | 21 | 22 |
| 23 | 24 | 25 | 26 | 27 | 28 | 29 |
| 30 |