
티스토리 뷰

CS-??제어핀 (내가원하는데로 지정해줘도 됨 기본 4) 나는 1로 바꿈
SCK
MOSI
MISO
VCC
GND


[아두이노 7강-2] 시간에 맞춰 온습도를 microSD 카드에 자동으로 기록하기
이번 시간에는 지금까지 아두이노를 활용한 다양한 활동들을 좀 묶어볼 예정입니다. 시계 측정, LCD 출...
blog.naver.com
https://ing-min.tistory.com/202
아두이노 _ MLX90614 _ 비접촉 온도센서
https://m.blog.naver.com/chandong83/221212429360 아두이노 사용기 #35 비접촉 온도센서를 다뤄보다. (MLX90614) 이번에 다뤄볼 녀석은 비접촉 온도센서이다. 위의 제품이 비접촉 온도 측정 장비인데 아마도 이
ing-min.tistory.com

**내가 오류난 이유는 sd카드 포멧문제였음
(sd카드 리더기로 fat32로 포멧하고 txt하나 만들어보는거 추천)
/*
SD card read/write
This example shows how to read and write data to and from an SD card file
The circuit:
SD card attached to SPI bus as follows:
** MOSI - pin 11
** MISO - pin 12
** CLK - pin 13
** CS - pin 4 (for MKRZero SD: SDCARD_SS_PIN)->1
created Nov 2010
by David A. Mellis
modified 9 Apr 2012
by Tom Igoe
This example code is in the public domain.
*/
#include <SPI.h>
#include <SD.h>
File myFile;
void setup() {
// Open serial communications and wait for port to open:
Serial.begin(9600);
while (!Serial) {
; // wait for serial port to connect. Needed for native USB port only
}
Serial.print("Initializing SD card...");
if (!SD.begin(1)) {
Serial.println("initialization failed!");
while (1);
}
Serial.println("initialization done.");
// open the file. note that only one file can be open at a time,
// so you have to close this one before opening another.
myFile = SD.open("test.txt", FILE_WRITE);
// if the file opened okay, write to it:
if (myFile) {
Serial.print("Writing to test.txt...");
myFile.println("testing 1, 2, 3.");
// close the file:
myFile.close();
Serial.println("done.");
} else {
// if the file didn't open, print an error:
Serial.println("error opening test.txt");
}
// re-open the file for reading:
myFile = SD.open("test.txt");
if (myFile) {
Serial.println("test.txt:");
// read from the file until there's nothing else in it:
while (myFile.available()) {
Serial.write(myFile.read());
}
// close the file:
myFile.close();
} else {
// if the file didn't open, print an error:
Serial.println("error opening test.txt");
}
}
void loop() {
// nothing happens after setup
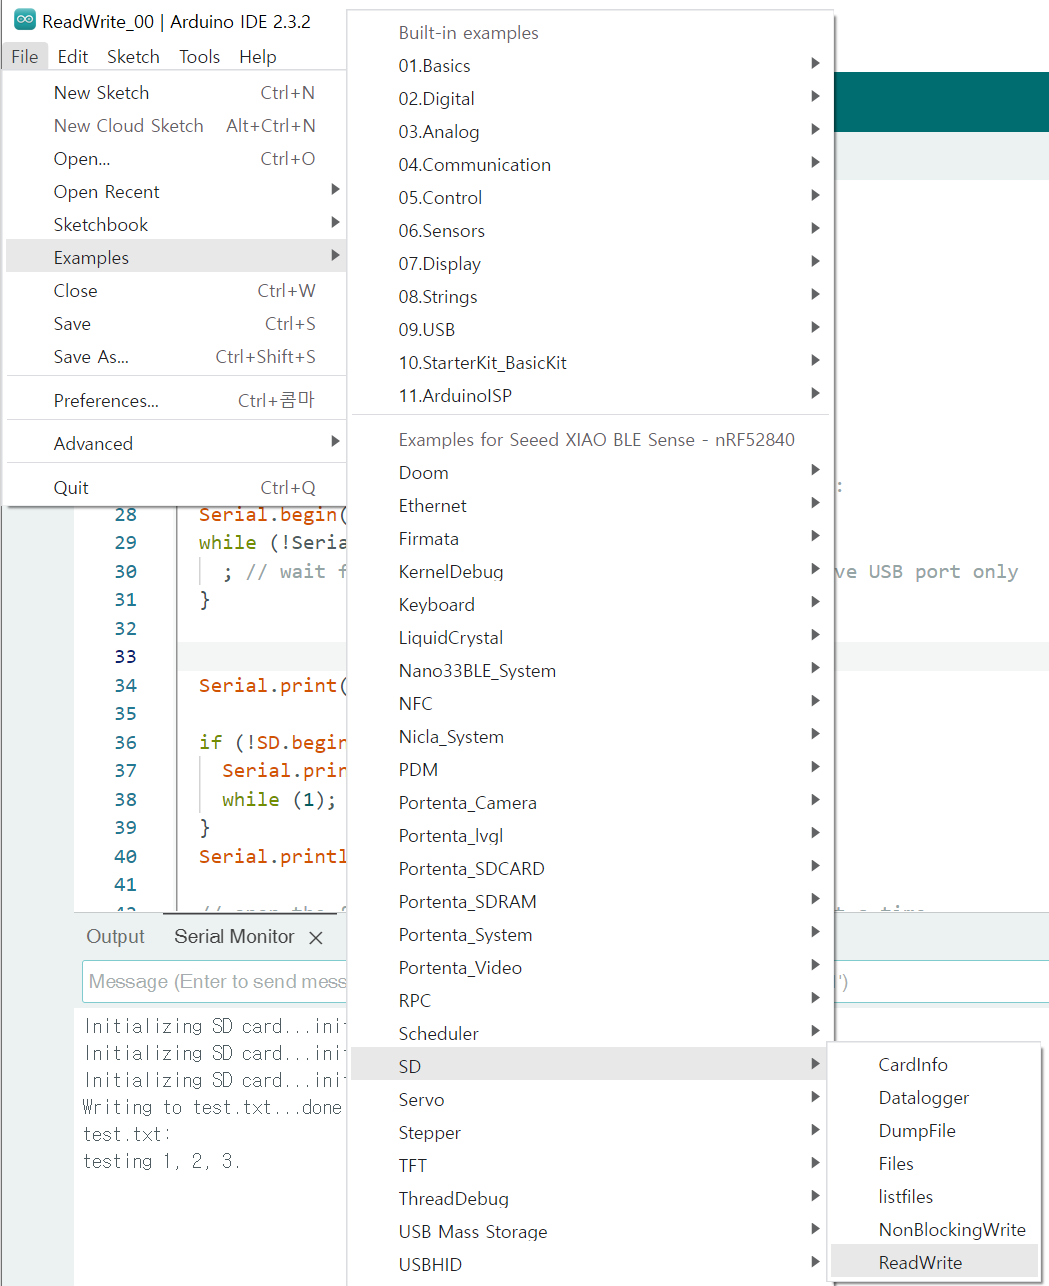
}읽고쓰기 기본 예제
비접촉 온도센서 붙여보자
라이브러리 설치
(메뉴 > 스케치 > 라이브러리 포함하기 > 라이브러리 관리)
Adafruit MLX90614 Libaray by Adafruit
메뉴 > 파일 > 예제 > Adafruit MLX90614 Libarary > mlxtest
/***************************************************
  This is a library example for the MLX90614 Temp Sensor

  Designed specifically to work with the MLX90614 sensors in the
  adafruit shop
  ----> https://www.adafruit.com/products/1747 3V version
  ----> https://www.adafruit.com/products/1748 5V version

  These sensors use I2C to communicate, 2 pins are required to
  interface
  Adafruit invests time and resources providing this open source code,
  please support Adafruit and open-source hardware by purchasing
  products from Adafruit!

  Written by Limor Fried/Ladyada for Adafruit Industries.
  BSD license, all text above must be included in any redistribution
 ****************************************************/

#include <Adafruit_MLX90614.h>

Adafruit_MLX90614 mlx = Adafruit_MLX90614();

void setup() {
  Serial.begin(9600);
  while (!Serial);

  Serial.println("Adafruit MLX90614 test");

  if (!mlx.begin()) {
    Serial.println("Error connecting to MLX sensor. Check wiring.");
    while (1);
  };

  Serial.print("Emissivity = "); Serial.println(mlx.readEmissivity());
  Serial.println("================================================");
}

void loop() {
  Serial.print("Ambient = "); Serial.print(mlx.readAmbientTempC());
  Serial.print("*C\tObject = "); Serial.print(mlx.readObjectTempC()); Serial.println("*C");
  Serial.print("Ambient = "); Serial.print(mlx.readAmbientTempF());
  Serial.print("*F\tObject = "); Serial.print(mlx.readObjectTempF()); Serial.println("*F");

  Serial.println();
  delay(500);
}
ambient 온도랑 object 온도를 1초에 10개씩 csv 파일로 저장해보자
#include <SPI.h>
#include <SD.h>
#include <Wire.h>
#include <Adafruit_MLX90614.h>

Adafruit_MLX90614 mlx = Adafruit_MLX90614();
String fileName = "test.csv"; // 전역 변수로 실제 사용할 파일명 저장
File myFile;
void setup() {
  Serial.begin(9600);
  while (!Serial) {
    ; // USB 연결이 될 때까지 대기
  }

  if (!SD.begin(1)) {
    Serial.println("SD card initialization failed!");
    return;
  }
  Serial.println("SD card initialization done.");

  if (!mlx.begin()) {
    Serial.println("Could not find a valid MLX90614 sensor, check wiring!");
    while (1);
  }
  myFile= SD.open("test.csv", FILE_WRITE);
  // 파일명 중복 검사 및 새 파일명 결정
  if (myFile) {
    Serial.print("Writing to test.csv...");
    myFile.println("xxx");
    // close the file:
    myFile.close();
    Serial.println("done.");
  } else {
    // if the file didn't open, print an error:
    Serial.println("error opening test.csv");
  }

}

void loop() {


    // open the file. note that only one file can be open at a time,
  // so you have to close this one before opening another.
  myFile = SD.open("test.csv", FILE_WRITE);
  // if the file opened okay, write to it:
    if (myFile) {
    unsigned long startTime = millis();
    for (int i = 0; i < 10; i++) {
      float ambientTemp = mlx.readAmbientTempC();
      float objectTemp = mlx.readObjectTempC();

      myFile.print(millis());
      myFile.print(", ");
      myFile.print(ambientTemp);
      myFile.print(", ");
      myFile.println(objectTemp);

      while (millis() - startTime < (i + 1) * 100);
    }
    myFile.close();
  } else {
    Serial.println("Error opening " + fileName);
  }

  // re-open the file for reading:
  myFile = SD.open("test.csv");
  if (myFile) {
    Serial.println("test.csv:");

    // read from the file until there's nothing else in it:
    while (myFile.available()) {
      Serial.write(myFile.read());
    }
    // close the file:
    myFile.close();
  } else {
    // if the file didn't open, print an error:
    Serial.println("error opening test.csv");
  }
  delay(1000 - 100);

}

https://www.instructables.com/Arduino-Infrared-Thermometer-Gun-MDF-Case/
Arduino Infrared Thermometer Gun MDF Case
Arduino Infrared Thermometer Gun MDF Case: This project is for making infrared thermometer with Arduino, the circuit is put in MDF case look-liked a medical infrared thermometer on market. The sensor infrared thermometer GY-906 is used to measure object te
www.instructables.com
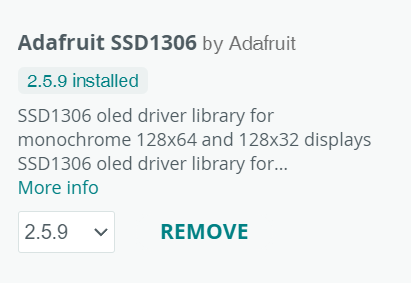
install library
Adafruits SSD1306
/*
www.engineer2you.com
Last modification: 28/09/2019
Code for Infrared Temperature (MDF case)
*/
#include <Adafruit_MLX90614.h>  //for infrared thermometer
#include <Adafruit_GFX.h>       // Include core graphics library for the display
#include <Adafruit_SSD1306.h>   // Include Adafruit_SSD1306 library to drive the display
#include <Fonts/FreeMonoBold18pt7b.h>  // Add a custom font

Adafruit_SSD1306 display(128, 64);            //Create display
Adafruit_MLX90614 mlx = Adafruit_MLX90614();  //for infrared thermometer
int temp;  // Create a variable to have something dynamic to show on the display
int ledPin = 16;
char *dtostrf2(double val, signed char width, unsigned char prec, char *sout) {
  char fmt[20];
  sprintf(fmt, "%%%d.%df", width, prec);
  sprintf(sout, fmt, val);
  return sout;
}


void setup()
{
  delay(100);  // This delay is needed to let the display to initialize
  pinMode(ledPin, OUTPUT);  // sets the pin as output
  display.begin(SSD1306_SWITCHCAPVCC, 0x3C);  // Initialize display with the I2C address of 0x3C
  display.clearDisplay();  // Clear the buffer
  display.setTextColor(WHITE);  // Set color of the text
  mlx.begin();  //start infrared thermometer
}

void loop()
{
  digitalWrite(ledPin, HIGH);
  temp++;  // Increase value for testing
  if(temp > 43)  // If temp is greater than 150
  {
    temp = 0;  // Set temp to 0
  }

  temp = mlx.readObjectTempC(); //comment this line if you want to test

  display.clearDisplay();  // Clear the display so we can refresh

  // Print text:
  display.setFont();
  display.setCursor(45,10);  // (x,y)
  display.println("TEMPERATURE");  // Text or value to print

  // Print temperature
  char string[10];  // Create a character array of 10 characters
  // Convert float to a string:
  dtostrf2(temp, 3, 0, string);  // (<variable>,<amount of digits we are going to use>,<amount of decimal digits>,<string name>)

  display.setFont(&FreeMonoBold18pt7b);  // Set a custom font
  display.setCursor(20,50);  // (x,y)
  display.println(string);  // Text or value to print
  display.setCursor(90,50);  // (x,y)
  display.println("C");  // Text or value to print
  display.setCursor(77,32);  // (x,y)
  display.println(".");  // Text or value to print

  // Draw a filled circle:
  display.fillCircle(18, 55, 7, WHITE);  // Draw filled circle (x,y,radius,color). X and Y are the coordinates for the center point

  // Draw rounded rectangle:
  display.drawRoundRect(16, 3, 5, 49, 2, WHITE);  // Draw rounded rectangle (x,y,width,height,radius,color)
                                                  // It draws from the location to down-right
    // Draw ruler step
  for (int i = 6; i<=45; i=i+3){
    display.drawLine(21, i, 22, i, WHITE);  // Draw line (x0,y0,x1,y1,color)
  }

  //Draw temperature
  temp = temp*0.43; //ratio for show
  display.drawLine(18, 46, 18, 46-temp, WHITE);  // Draw line (x0,y0,x1,y1,color)

  display.display();  // Print everything we set previously

}
오류
에러 메시지 dtostrf
해결책
구글 검색을 해보니 현재 이 함수는 avr에만 지원되고 arm에는 아직까지 지원이 안 되는 것으로 보인다. 아래 위치에서 stostrf.c에 있는 함수를 건전지 tester 내에 이름을 변경하여 포함시켰다.
char *dtostrf2(double val, signed char width, unsigned char prec, char *sout) {
  char fmt[20];
  sprintf(fmt, "%%%d.%df", width, prec);
  sprintf(sout, fmt, val);
  return sout;
}
[출처] 아두이노 Due를 사용하여 건전지 테스터를 만들어보자, 생활에 유용하네요~~|작성자 ZETA7위의코드를 추가해서 oled 출력
=
#include <SPI.h>
#include <SD.h>
#include <Wire.h>
#include <Adafruit_MLX90614.h>
#include <Adafruit_GFX.h>
#include <Adafruit_SSD1306.h>
#include <Fonts/FreeMonoBold18pt7b.h>

Adafruit_SSD1306 display(128, 64);
Adafruit_MLX90614 mlx = Adafruit_MLX90614();

String fileName = "test.csv";
File myFile;

int temp;
int ledPin = 16;

const int FILTER_SIZE = 5;
float tempReadings[FILTER_SIZE];
int readIndex = 0;
float totalTemp = 0;

char *dtostrf2(double val, signed char width, unsigned char prec, char *sout) {
  char fmt[20];
  sprintf(fmt, "%%%d.%df", width, prec);
  sprintf(sout, fmt, val);
  return sout;
}

void setup() {
  delay(100);
  pinMode(ledPin, OUTPUT);

  display.begin(SSD1306_SWITCHCAPVCC, 0x3C);
  display.clearDisplay();
  display.setTextColor(WHITE);

  mlx.begin();

  Serial.begin(9600);
  while (!Serial) {
    ;
  }

  if (!SD.begin(1)) {
    Serial.println("SD card initialization failed!");
    return;
  }
  Serial.println("SD card initialization done.");

  myFile = SD.open("test.csv", FILE_WRITE);
  if (myFile) {
    Serial.print("Writing to test.csv...");
    myFile.println("Time, Ambient Temperature, Object Temperature");
    myFile.close();
    Serial.println("done.");
  } else {
    Serial.println("error opening test.csv");
  }

  for (int i = 0; i < FILTER_SIZE; i++) {
    tempReadings[i] = 0;
  }
}

void loop() {
  digitalWrite(ledPin, HIGH);

  unsigned long startTime = millis();
  float ambientTemp = 0;
  float objectTemp = 0;

  for (int i = 0; i < 10; i++) {
    float temp = mlx.readObjectTempC();

    if (temp >= 35 && temp <= 42) {
      totalTemp -= tempReadings[readIndex];
      tempReadings[readIndex] = temp;
      totalTemp += tempReadings[readIndex];
      readIndex = (readIndex + 1) % FILTER_SIZE;
      objectTemp = totalTemp / FILTER_SIZE;
    }

    while (millis() - startTime < (i + 1) * 100);
  }

  display.clearDisplay();

  display.setFont();
  display.setCursor(45, 10);
  display.println("TEMPERATURE");

  char string[10];
  dtostrf2(objectTemp, 3, 0, string);
  display.setFont(&FreeMonoBold18pt7b);
  display.setCursor(20, 50);
  display.println(string);
  display.setCursor(90, 50);
  display.println("C");
  display.setCursor(77, 32);
  display.println(".");

  display.fillCircle(18, 55, 7, WHITE);
  display.drawRoundRect(16, 3, 5, 49, 2, WHITE);

  for (int i = 6; i <= 45; i = i + 3) {
    display.drawLine(21, i, 22, i, WHITE);
  }

  temp = objectTemp * 0.43;
  display.drawLine(18, 46, 18, 46 - temp, WHITE);
  display.display();

  myFile = SD.open("test.csv", FILE_WRITE);
  if (myFile) {
    myFile.print(millis());
    myFile.print(", ");
    myFile.print(ambientTemp);
    myFile.print(", ");
    myFile.println(objectTemp);
    myFile.close();
  } else {
    Serial.println("Error opening " + fileName);
  }

  myFile = SD.open("test.csv");
  if (myFile) {
    Serial.println("test.csv:");
    while (myFile.available()) {
      Serial.write(myFile.read());
    }
    myFile.close();
  } else {
    Serial.println("error opening test.csv");
  }
}
+
맥박
https://ing-min.tistory.com/221
터치디자이너에 온도 HP 센서 생체신호 받아오기(Arduino)
float filteredSignal = 0; // EMA 필터링된 신호 float alpha = 0.1; // EMA 필터의 가중치 int threshold = 700; // 손이 있음/없음을 구분하는 임계값 bool handPresent = false; // 손의 존재 여부 void loop() { int signal = analogRea
ing-min.tistory.com

#include <SPI.h>
#include <SD.h>
#include <Wire.h>
#include <Adafruit_MLX90614.h>
#include <Adafruit_GFX.h>
#include <Adafruit_SSD1306.h>
#include <Fonts/FreeMonoBold9pt7b.h>

Adafruit_SSD1306 display(128, 64);
Adafruit_MLX90614 mlx = Adafruit_MLX90614();

String fileName = "test.csv";
File myFile;

int temp;
int ledPin = 16;

const int FILTER_SIZE = 5;
float tempReadings[FILTER_SIZE];
int readIndex = 0;
float totalTemp = 0;

float filteredSignal = 0;
float alpha = 0.1;
int threshold = 700;
bool handPresent = false;
int PulseSensorPurplePin = A0;

char *dtostrf2(double val, signed char width, unsigned char prec, char *sout) {
  char fmt[20];
  sprintf(fmt, "%%%d.%df", width, prec);
  sprintf(sout, fmt, val);
  return sout;
}

void setup() {
  delay(100);
  pinMode(ledPin, OUTPUT);

  display.begin(SSD1306_SWITCHCAPVCC, 0x3C);
  display.clearDisplay();
  display.setTextColor(WHITE);

  mlx.begin();

  Serial.begin(9600);
  while (!Serial) {
    ;
  }

  if (!SD.begin(1)) {
    Serial.println("SD card initialization failed!");
    return;
  }
  Serial.println("SD card initialization done.");

  myFile = SD.open("test.csv", FILE_WRITE);
  if (myFile) {
    Serial.print("Writing to test.csv...");
    myFile.println("Time, Ambient Temperature, Object Temperature, Pulse");
    myFile.close();
    Serial.println("done.");
  } else {
    Serial.println("error opening test.csv");
  }

  for (int i = 0; i < FILTER_SIZE; i++) {
    tempReadings[i] = 0;
  }
}

void loop() {
  digitalWrite(ledPin, HIGH);

  unsigned long startTime = millis();
  float ambientTemp = 0;
  float objectTemp = 0;

  for (int i = 0; i < 10; i++) {
    float temp = mlx.readObjectTempC();

    if (temp >= 35 && temp <= 42) {
      totalTemp -= tempReadings[readIndex];
      tempReadings[readIndex] = temp;
      totalTemp += tempReadings[readIndex];
      readIndex = (readIndex + 1) % FILTER_SIZE;
      objectTemp = totalTemp / FILTER_SIZE;
    }

    while (millis() - startTime < (i + 1) * 100);
  }

  int signal = analogRead(PulseSensorPurplePin);
  filteredSignal = alpha * signal + (1 - alpha) * filteredSignal;

  // 맥박 값의 범위 제한 (예: 30 ~ 200)
  if (filteredSignal < 30 || filteredSignal > 200) {
    handPresent = false;
  } else {
    handPresent = true;
  }

    display.clearDisplay();

  // 온도 값을 표시할 네모 그리기
  display.drawRect(28, 18, 68, 24, WHITE);

  display.setFont(&FreeMonoBold9pt7b);
  display.setCursor(33, 38);
  display.println(String(objectTemp, 1));
  display.setCursor(78, 38);
  display.println("C");

  // 맥박 값 또는 "No hand" 텍스트를 표시할 네모 그리기
  display.drawRect(28, 44, 68, 24, WHITE);

  if (handPresent) {
    display.setCursor(33, 62);
    display.println(String(filteredSignal, 0));
  } else {
    display.setCursor(33, 62);
    display.println("X");
  }

  display.display();

  myFile = SD.open("test.csv", FILE_WRITE);
  if (myFile) {
    myFile.print(millis());
    myFile.print(", ");
    myFile.print(ambientTemp);
    myFile.print(", ");
    myFile.print(objectTemp);
    myFile.print(", ");
    myFile.println(filteredSignal);
    myFile.close();
  } else {
    Serial.println("Error opening " + fileName);
  }

  myFile = SD.open("test.csv");
  if (myFile) {
    Serial.println("test.csv:");
    while (myFile.available()) {
      Serial.write(myFile.read());
    }
    myFile.close();
  } else {
    Serial.println("error opening test.csv");
  }

  delay(10);
}
맥박 없을땐 x 표기
'Iot' 카테고리의 다른 글
| 아두이노 - GY-302 BH1750 조도센서 (1) | 2024.04.18 |
|---|---|
| 아두이노_온습도센서 : DHT sensor (0) | 2024.04.17 |
| SparkFun 로직 레벨 컨버터: 레벨 시프트(TXS0108) (2) | 2024.04.12 |
| I2C 통신_msp_ SPI_ serial 등등.. 아두이노 통신 (0) | 2024.02.21 |
| XIAO BLE nRF52840 Sense _ 아두이노 연결하기 (1) | 2024.02.07 |
- Total
- Today
- Yesterday
- RNN
- TouchDesigner
- VR
- MQTT
- Midjourney
- opticalflow
- opencv
- Express
- node.js
- docker
- ESP32
- zclaw
- houdini
- colab
- Unity
- Python
- AI
- DeepLeaning
- MCP
- 4d guassian splatting
- 유니티
- 라즈베리파이
- sequelize
- OpenClaw
- 후디니
- Java
- Arduino
- three.js
- VFXgraph
- CNC
| 일 | 월 | 화 | 수 | 목 | 금 | 토 |
|---|---|---|---|---|---|---|
| 1 | 2 | 3 | 4 | |||
| 5 | 6 | 7 | 8 | 9 | 10 | 11 |
| 12 | 13 | 14 | 15 | 16 | 17 | 18 |
| 19 | 20 | 21 | 22 | 23 | 24 | 25 |
| 26 | 27 | 28 | 29 | 30 |