
티스토리 뷰
float filteredSignal = 0; // EMA 필터링된 신호
float alpha = 0.1; // EMA 필터의 가중치
int threshold = 700; // 손이 있음/없음을 구분하는 임계값
bool handPresent = false; // 손의 존재 여부

void loop() {
  int signal = analogRead(PulseSensorPurplePin); // PulseSensor의 값을 읽음
  filteredSignal = alpha * signal + (1 - alpha) * filteredSignal; // EMA 필터 적용

  // 손의 존재 여부 판단
  if (filteredSignal > threshold) {
    // 임계값보다 높으면 손이 없는 것으로 판단
    handPresent = false;
  } else {
    // 임계값보다 낮으면 손이 있는 것으로 판단
    handPresent = true;
  }

  // 손이 있는 상태에서만 데이터 처리
  if (handPresent) {
    // 손이 있을 때의 로직을 여기에 구현
    // 예: LED를 켜거나, 시리얼로 데이터를 전송
    digitalWrite(LED, HIGH);
    Serial.print("Filtered Signal: ");
    Serial.println(filteredSignal);
  } else {
    // 손이 없을 때의 로직을 여기에 구현
    // 예: LED를 끄거나, 손이 없음을 알리는 메시지를 전송
    digitalWrite(LED, LOW);
    Serial.println("No hand detected.");
  }

  delay(10); // 데이터 속도 조절을 위한 딜레이
}
1. 아두이노 연결
https://ing-min.tistory.com/202
아두이노 _ MLX90614 _ 비접촉 온도센서
https://m.blog.naver.com/chandong83/221212429360 아두이노 사용기 #35 비접촉 온도센서를 다뤄보다. (MLX90614) 이번에 다뤄볼 녀석은 비접촉 온도센서이다. 위의 제품이 비접촉 온도 측정 장비인데 아마도 이
ing-min.tistory.com
https://ing-min.tistory.com/214
아두이노 생체신호 센서 Data 파이썬으로 받아서 .csv 저장하기
아두이노 생체신호 센서 Data 파이썬으로 받아서 .csv 저장하기 0.센서 gsr, pulse sensor https://ing-min.tistory.com/204 아두이노 SEN-11574 심박 센서 https://surtrtech.com/2018/12/28/interfacing-1-heart-pulse-beat-sensor-amped-s
ing-min.tistory.com
비접촉 온도센서 / 심박 센서
MLX90614 / SEN 11574
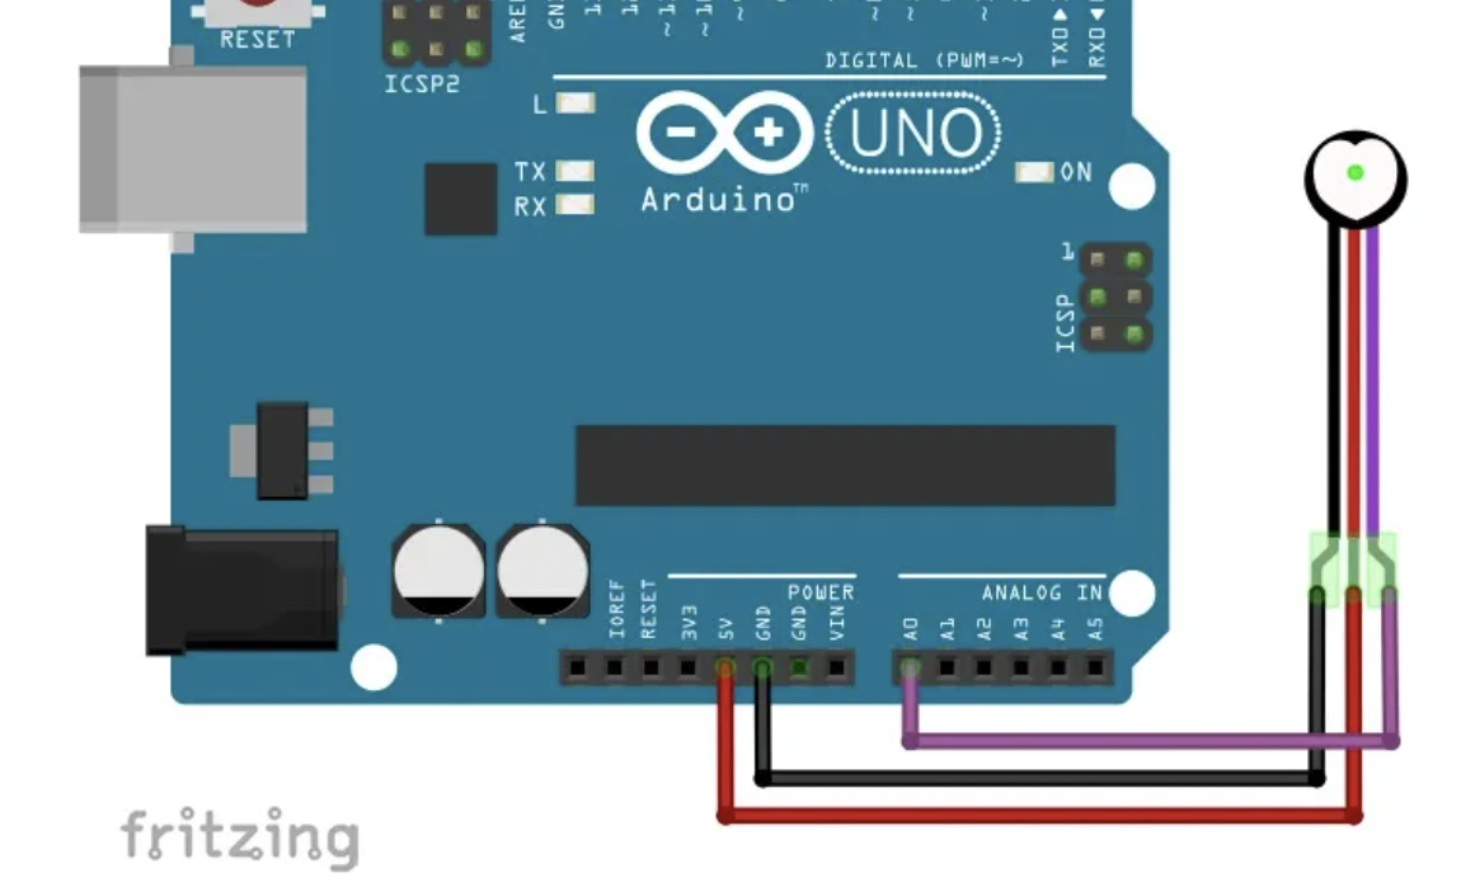
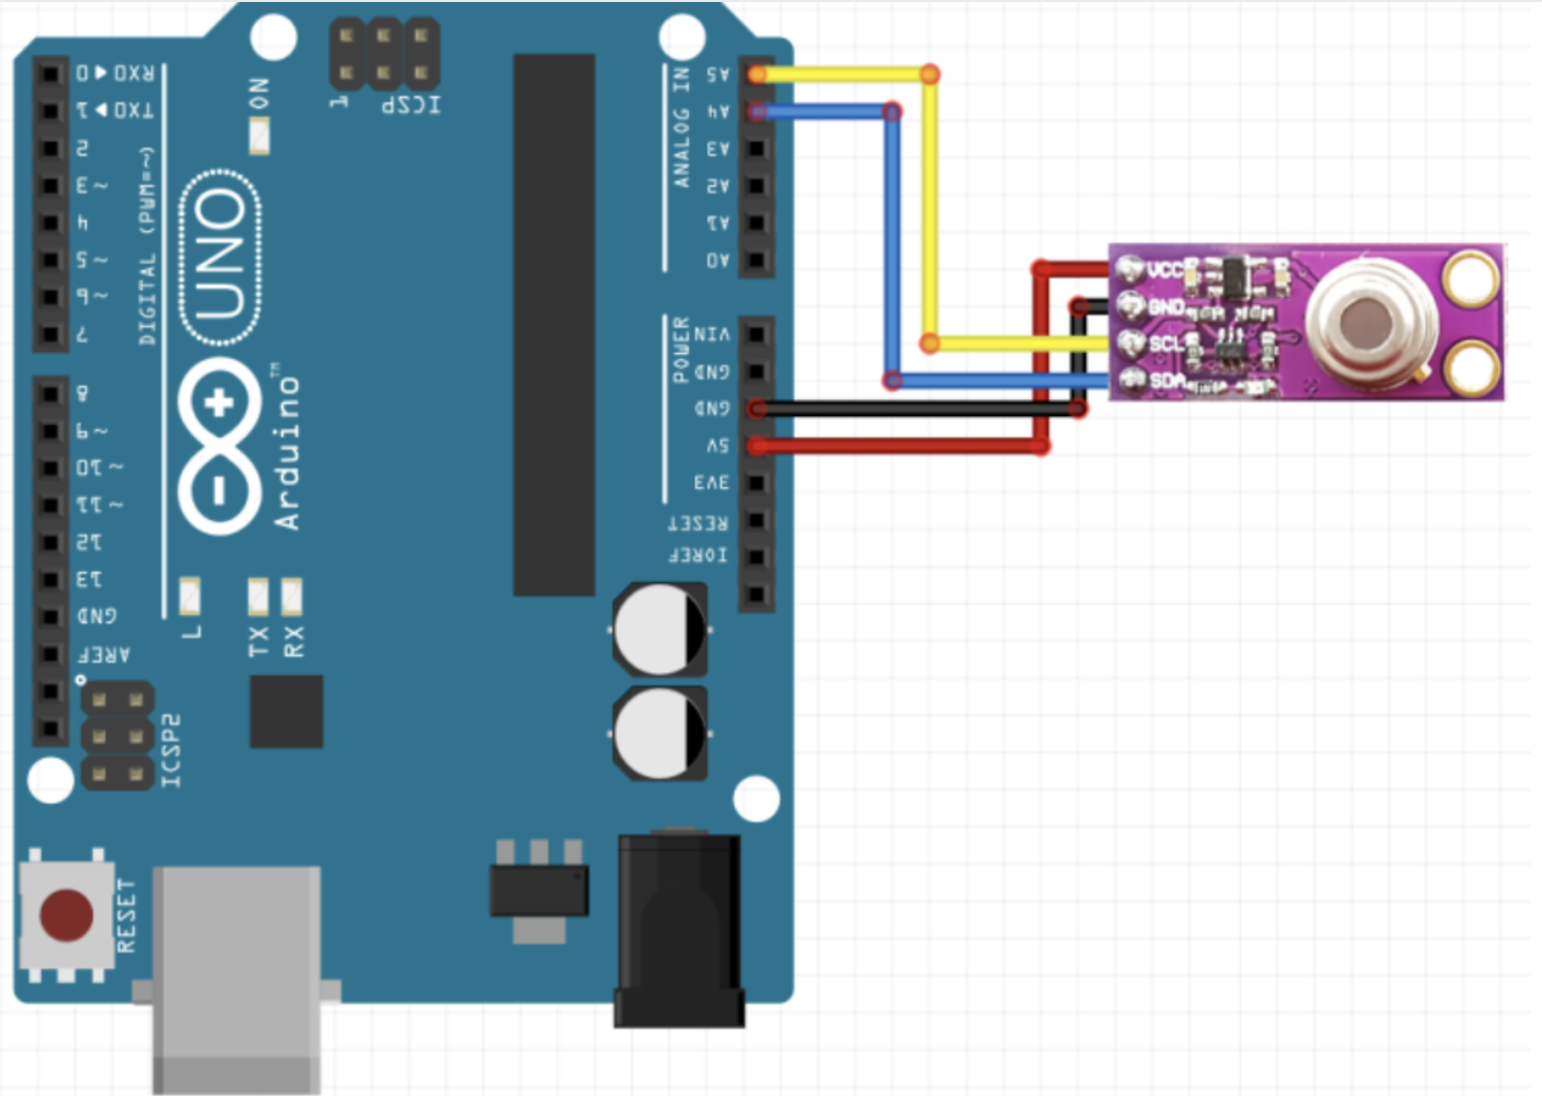
핀넘버 a5,a4 주의 .5v.. /a0
자세한 설명은 위의 링크에 다 있다.
2. 코드
두신호를 받아와서 시리얼 통신으로 터디에 보내보자.
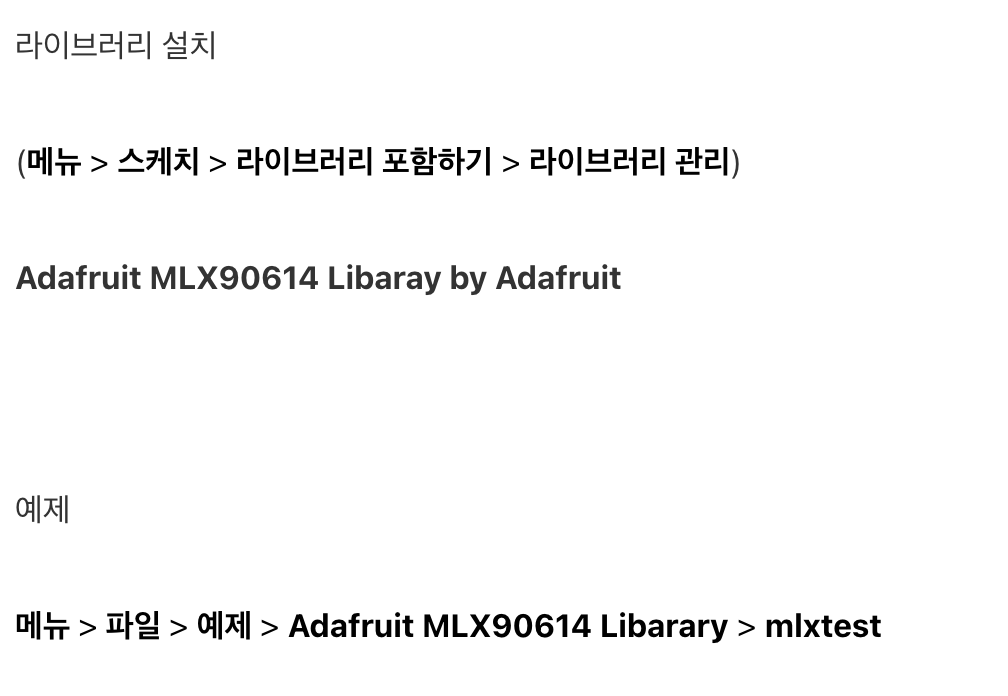
#include <Adafruit_MLX90614.h>

Adafruit_MLX90614 mlx = Adafruit_MLX90614();

// Pulse Sensor Setup
int PulseSensorPurplePin = 0; // Pulse Sensor PURPLE WIRE connected to ANALOG PIN 0
int LED = LED_BUILTIN; // The on-board Arduino LED
float filteredSignal = 0; // Filtered signal value, using EMA

// EMA Filter Settings
float alpha = 0.1; // Smoothing factor [0-1], higher value gives more weight to recent samples

void setup() {
  Serial.begin(9600);
  while (!Serial); // Wait for serial port to connect. Needed for native USB

  pinMode(LED, OUTPUT); // Pin that will blink to your heartbeat!

  if (!mlx.begin()) {
    Serial.println("Error connecting to MLX sensor. Check wiring.");
    while (1);
  };
}

void loop() {
  // Reading Pulse Sensor and applying EMA filter
  int signal = analogRead(PulseSensorPurplePin); // Read the PulseSensor's value
  filteredSignal = alpha * signal + (1 - alpha) * filteredSignal; // Apply EMA filter

  // Blink LED with each heartbeat (logic may need adjustment based on filtered signal)
  if (filteredSignal > 580) { // Adjusted threshold for the filtered signal
    digitalWrite(LED, HIGH);
  } else {
    digitalWrite(LED, LOW);
  }

  // Reading and Printing Temperature Sensor Data
  float objectTempC = mlx.readObjectTempC(); // Read object temperature in Celsius
  float ambientTempC = mlx.readAmbientTempC(); // Read ambient temperature in Celsius

  // Serial output
  //Serial.print("Filtered Pulse Signal: ");
  Serial.print(filteredSignal);
  //Serial.print("\tObject Temp C: ");
  Serial.print(",");
  Serial.print(objectTempC);
  //Serial.print("\tAmbient Temp C: ");
  Serial.print(",");
  Serial.println(ambientTempC);

  delay(10); // Delay for a bit to slow down the data rate
}
// Serial output
Serial.print(filteredSignal);
Serial.print(",");
Serial.print(objectTempC);
Serial.print(",");
Serial.println(ambientTempC);
이부분이 터디로 보내진다.나는 ","로 구분했다.
3. 터치디자이너
시리얼 값 받아오기
- port : 보드랑 맞추기
-active하면 값 받아져온다.
-나는 안받아져왔다. 문자가 포함되서그런가..?
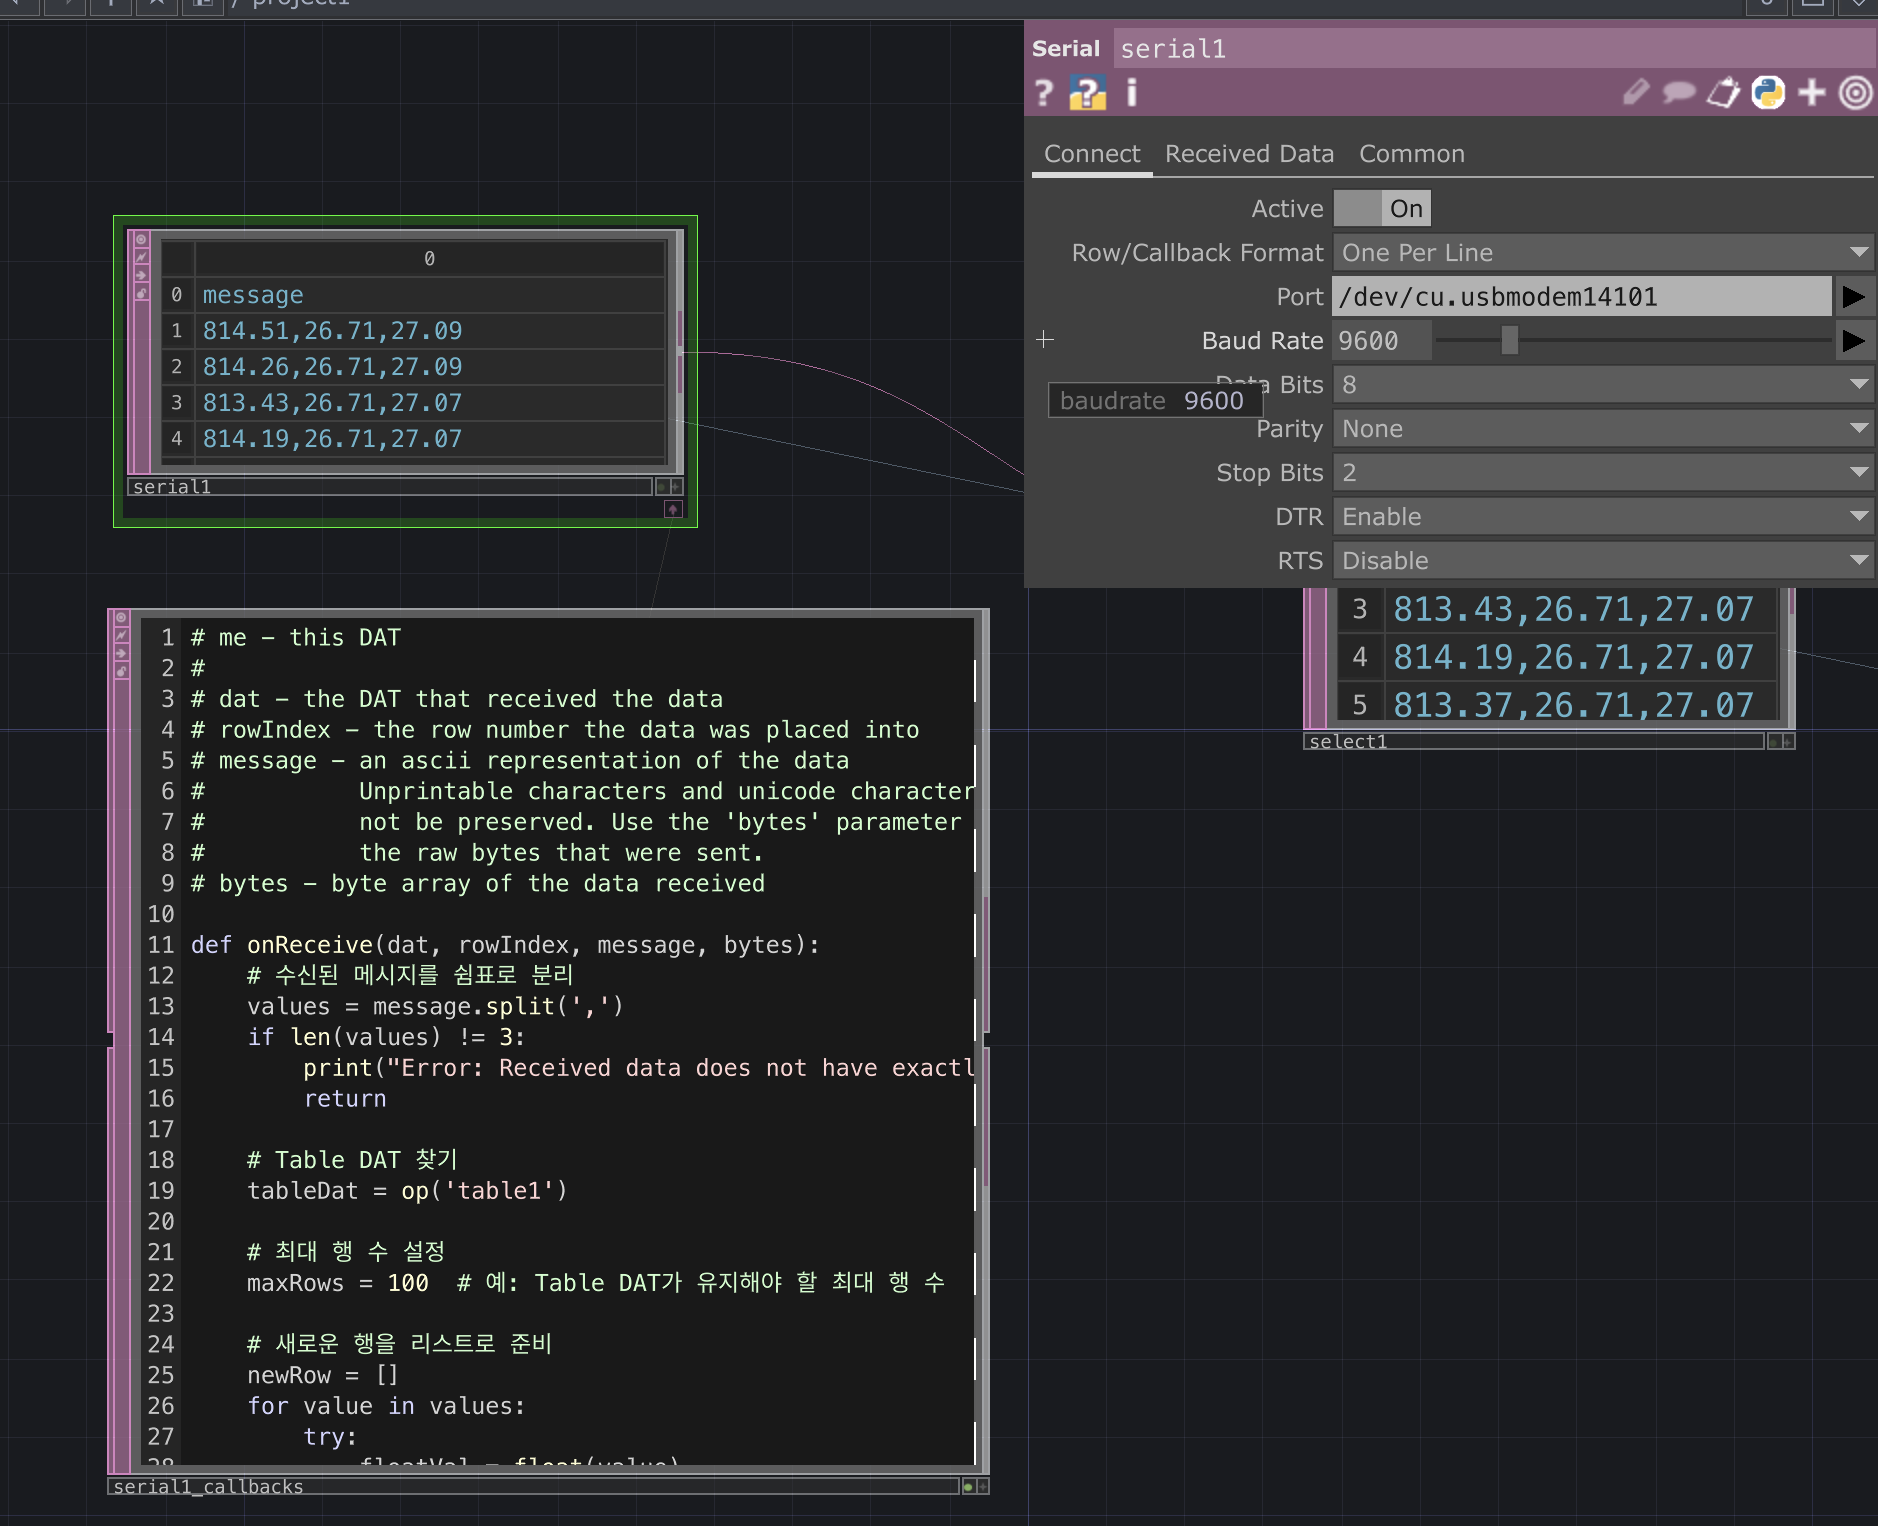
4. serial_callbacks
여기서 받아져오는 값(message). 수정해보자. ->value
# me - this DAT
#
# dat - the DAT that received the data
# rowIndex - the row number the data was placed into
# message - an ascii representation of the data
#           Unprintable characters and unicode characters will
#           not be preserved. Use the 'bytes' parameter to get
#           the raw bytes that were sent.
# bytes - byte array of the data received

def onReceive(dat, rowIndex, message, bytes):
    # 수신된 메시지를 쉼표로 분리
    values = message.split(',')
    if len(values) != 3:
        print("Error: Received data does not have exactly 3 values")
        return

    # Table DAT 찾기
    tableDat = op('table1')

    # 최대 행 수 설정
    maxRows = 100  # 예: Table DAT가 유지해야 할 최대 행 수

    # 새로운 행을 리스트로 준비
    newRow = []
    for value in values:
        try:
            floatVal = float(value)
            newRow.append(str(floatVal))
        except ValueError:
            print(f"Error: Cannot convert {value} to float")
            newRow.append('')  # 변환할 수 없는 값은 빈 문자열로 추가

    # 새 행 데이터를 Table DAT에 추가
    if newRow:
        tableDat.appendRow(newRow)

        # Table DAT의 행 수가 maxRows를 초과하는 경우, 가장 오래된 행(첫 번째 행) 삭제
        while tableDat.numRows > maxRows:
            tableDat.deleteRow(0)
최종 코드인데 왜이러냐면, 테이블에 각 행에 값을 넣을거기때문.
op('table1')여기에 아래의 테이블과 같은 이름을 넣어줘야한다. !

5.테이블 만들기
6. chop to 로 그래프 시각화

맨위가 HP
아래가 오브젝트 온도 맨 아래가 엠비언트 온도
이제 이 값들을 어떻게 할지는 생각해봐야함..
'TouchDesigner' 카테고리의 다른 글
| Touchdesigner_ AI model 불러오기 (.pth) (0) | 2024.03.17 |
|---|---|
| Touchdesigner _ StableDiffusion :Comfy UI (0) | 2024.03.16 |
| Touchdesigner _ TD에서 python lib 즉시 설치 노드 (0) | 2024.03.16 |
| stablediffusion_touchdesigner (1) | 2024.02.24 |
| 터치디자이너 : Web Client DAT : API 연결 (NSRDB 데이터) (0) | 2024.02.23 |
- Total
- Today
- Yesterday
- Express
- sequelize
- 후디니
- VR
- OpenClaw
- 4d guassian splatting
- CNC
- Python
- Arduino
- node.js
- houdini
- colab
- DeepLeaning
- Midjourney
- three.js
- MQTT
- docker
- TouchDesigner
- opticalflow
- MCP
- 유니티
- RNN
- ESP32
- zclaw
- VFXgraph
- Java
- 라즈베리파이
- AI
- opencv
- Unity
| 일 | 월 | 화 | 수 | 목 | 금 | 토 |
|---|---|---|---|---|---|---|
| 1 | 2 | 3 | 4 | |||
| 5 | 6 | 7 | 8 | 9 | 10 | 11 |
| 12 | 13 | 14 | 15 | 16 | 17 | 18 |
| 19 | 20 | 21 | 22 | 23 | 24 | 25 |
| 26 | 27 | 28 | 29 | 30 |